Friendship ended with Overviewer, now BlueMap is my bestfriend
A massive upgrade to the server maps has arrived! All of the old maps have been re-rendered and the server map will now be available.
Hello! I have great news about the server map renders! We are now using BlueMap to generate world maps to explore in your browser. I will explain why below, as well as some of the plus sides and limitations of the switch.
Why switch now?
So glad you asked. It all started when I upgraded the SMP server to Minecraft 1.20, and suddenly any chunks that had been visited in the new version were not rendered at all. A quick visit to Minecraft Overviewer’s website tells me that the project is no longer updated.
So I began the search for new map rendering software to replace Overviewer. Their blog post suggested BlueMap so I gave it a try. It seemed to check all the boxes I was looking for and I really like the way maps turned out after a few tests and learning how to configure it.
Pros and Cons
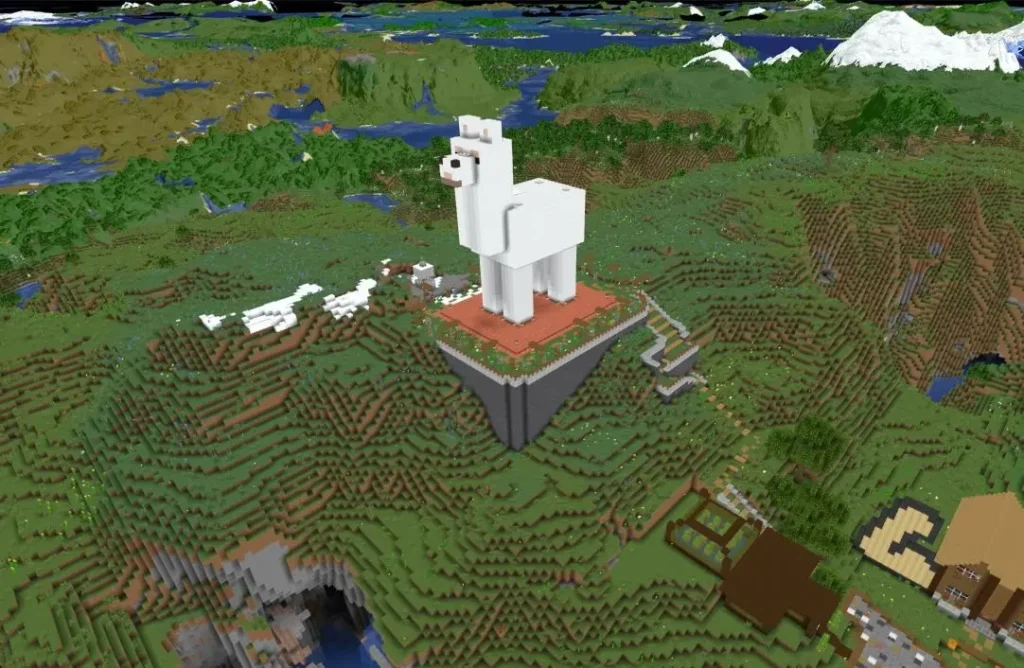
BlueMap seems to be an improvement in all ways. It renders a full 3D model so you can explore worlds in much greater detail like never before. It also has the advantage of taking up less space (costing me less money to store). On average, maps are about 30% smaller, as an extreme example though, the Castles & Casinos & VIllages map render was a whole 30GB, and now it is 8.5GB.
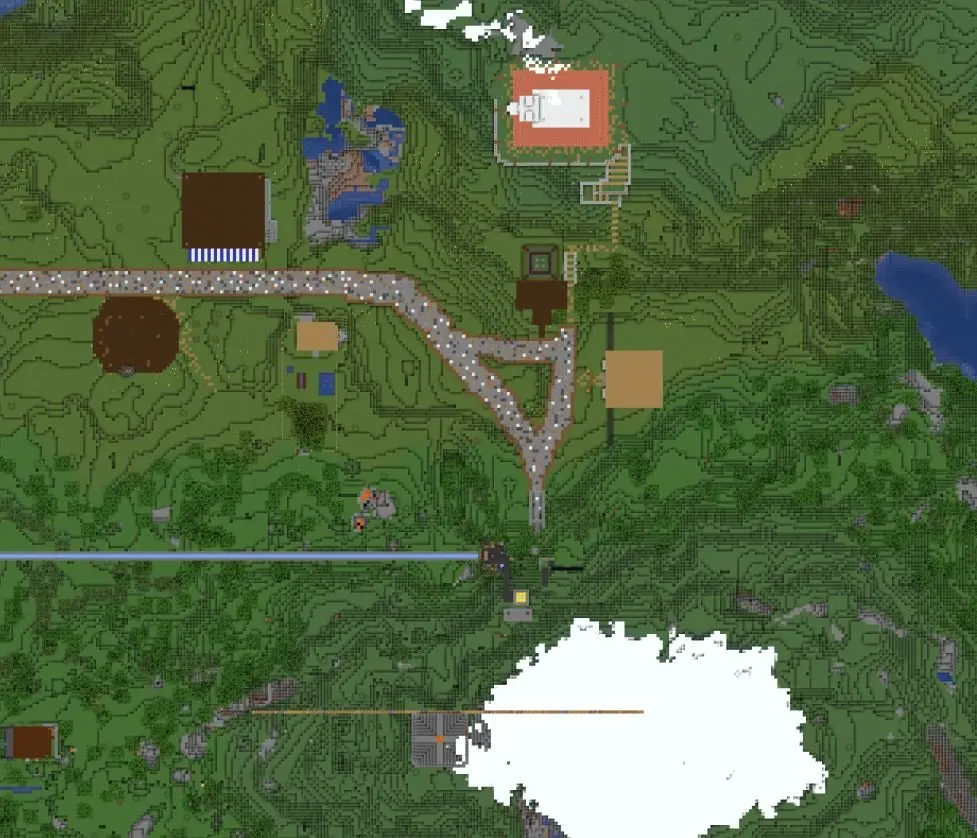
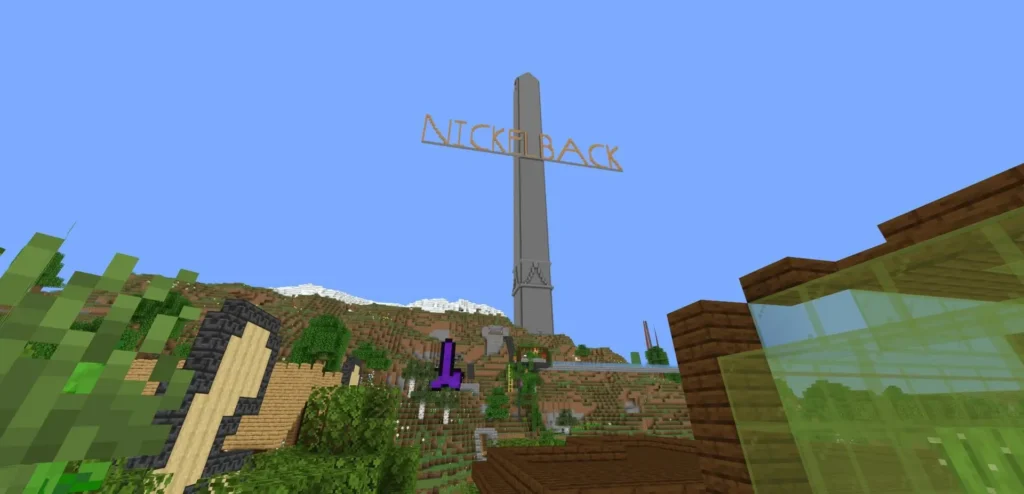
Top Down view like a 2D map in-game.Perspective view from any angle.Free-cam, lets you explore the world in first person like spectator mode in-game.
BlueMap lets you view a 2D map, a perspective view, or even go through the world in first person, similar to spectator mode in-game. Be sure to check it out on the server map, or on any of the past maps!
Like most renderers, it does not render entities, so you will still need to download the world and play it to see your pets, read your signs or look at item frames and banners. Overviewer couldn’t do it either, nor would it even let you zoom in enough to see enough detail anyways so I don’t see this as an issue with BlueMap.
Overall I am quite happy with BlueMap and the significant upgrade in map quality. Thanks for reading!
Only the strong survive, and some very careful cowards
This post is considered out of date. This may be for a number of reasons, for example: the information may be out of date, the topic may be irrelevant now, or simply that the post is quite old but I wanted to keep the history.
For the first time ever, the TNTable Community will have a hardcore SMP server available to all players! It will run alongside the regular SMP and playing is completely optional.
Heyo me again, back with some exciting news about the new hardcore world coming to a server near you on January 22nd.
There isn’t much to say beyond good luck. It is vanilla Hardcore Minecraft. Once you die you are dead, and are stuck in spectator mode. There will be a timer for how long you can spend in spectator mode though. Sitting for too long will get you banned from the server. This is done to prevent abuse.
Rules are simple, don’t be a terrible person, I might even stretch and say be a good person. The moderators will be fairly hands off with this server but will intervene if an issue arises, and we will be much less forgiving on this server.
If you have any questions feel free to ask in Discord, the mods and myself are pretty active there, even at the ungodly hours of the day and night.
How to Join
Joining the new server is simple. Login to the regular server and type /server hardcore. If you want to go back to the main server type /server smp. Easy right? Just make sure that it is after January 22nd otherwise you will be met with an error.
Other Servers
Just a reminder that there are a few servers under the TNTable umbrella. Here is the list with details on how to join as of January 2022.
The low-down on the update to Minecraft 1.18 and what it means for the server
There are many changes coming to the TNTable SMP server with Minecraft 1.18. Check this post out for the details and what it means for you.
Minecraft 1.18 is being released on November 30th! That means some changes coming for the server, this time there are many. I am doing a bit of an overhaul on the server and adding more functionality and features to make the experience more pleasant. Buckle up because this is a long post with a lot of important information.
Details
Minecraft Changes
A lot has changed in Minecraft, check out the wiki page for an extensive list of changes. I will summarize a few though.
Terrain generation and world changes
Worlds now go up to y=320 and down to y=-64
Ore spawning has changed and there are new distribution algorithms. Check out this table for details. Ore generation is increased between certain heights
More uses for copper ore now
Mountain Goats
Changes to cave generation
Noodle style and caverns added to improve generation
More dungeons, especially below y=0
Aquifers now in the game. Local water levels allows for underground lakes
Technical Change: Minecraft will now be a little more threaded, providing a performance boost to some systems
Simulation vs Render Distance
New simulation distance determines how far ticks will occur around the player. This is CPU heavy
Render distance is graphical and can allow you to see more terrain than your CPU is processing. This is GPU heavy
Multiplayer Sleep functionality
Loads of bug fixes
Datapack Changes
TNTable Datapack
I have cleaned up the TNTable datapack and removed recipes that are provided through other packs now. Do not worry though, there is no functionality being lost, it is being added elsewhere.
Other Datapacks
Below is the list of datapacks that are going to be included on the server at launch, details on usage will be provided later in the post and a dedicated page will be made. For now, here are the packs you can expect to see on the server. However they are all subject to change without notice.
Armour Statues: Book to edit armour stand positions
Fast Leaf Decay
Custom Nether Portals
Cauldron Concrete: Drop concrete powder into a cauldron to make concrete
Redstone Rotation Wrench
Terracotta Rotation Wrench
Player Head Drops: Players drop heads when killed by another player
Double Shulker Shells: Shulkers drop two shells instead of one
Larger Phantoms: Phantoms get larger the longer it has been since sleeping
Spawn TP: Command to teleport to world spawn
Home TP: Command to set and teleport to a home spawn
Tag: HermitCraft Tag game on the server
Dropper to Dispenser: Turn droppers into dispensers
Rotten Flesh to Leather: Smelt rotten flesh into leather
Sandstone Dyeing: Dye sand into red sand
Craftable Gravel, Horse Armour, God Apples, Saddles, Name Tags, and Bundles
Server Map/World Reset 🗺️
To take full advantage of the world and all the changes to generation, the map will be reset to provide a fresh start. This is a great opportunity to make a base in the new caverns that can be 100+ blocks tall, or perhaps you want a secret lair on top of a mountain to make sure nobody can find you. Following the release of PaperMC for Minecraft 1.18, the server will be updated and there will be a launch party of sorts on Discord where we can all join the server and start this new journey together. Keep an eye on Discord for information about that.
Server Changes
There are many changes coming to the server that you can read all about here.
First of all, Phantoms are coming back to the server, and with the Larger Phantoms datapack this will mean that they get larger the longer it has been since you’ve last slept. But do not fret! The newly added teleport functionality should make it easier to get back to your home sweet home so you can snuggle up in bed 🛏️ to keep those pesky nightmare creatures away! Isn’t that exciting?!?
Datapacks
Usage Guide
Alrighty this may be long, but it is important. There will be a page dedicated to this information shortly if I feel that it would help. Otherwise some of this information will also be in the server book so keep that nice and safe.
Name Colours
You get to choose your name colour, and you get to choose your name colour, you ALL get to choose your own name colour!!!! No more having to beg for just the right colour for your name you can do it yourself. Woo!
All you have to do is type in a teeny tiny command. You ready?
/trigger name_color
🤯 Boom, that’s it. You will get a nice little prompt in chat and a list of colours to click on and choose from. Isn’t that simply amazing? I think so.
Armour Statues
Here is a handy dandy YouTube tutorial because I can’t be bothered to type it all out. I will tell you how to get started though so don’t worry. You need to get the book.
To do that, make a Book and Quill and put some random garbage in there. Doesn’t matter. Then sign the book and call it Statues, spelled exactly like that with the capital S. Some magic happens and you’ve got a fancy little book to modify armour stands now.
Redstone and Terracotta Rotation Wrench
The recipes can be found in your in-game crafting book. 📒
Teleportation 🏠
Well well well, I am finally adding in /spawn and /home functionality. Maybe we can get a nice spawn now that it is easy and quick to get there. Anyways, to teleport to spawn use /trigger spawn. Home is a little more complex, first you have to set it. Use /trigger sethome to set your home, and /trigger home to get back there after a long day in the mines, at spawn or wherever you decide to spend your time in Minecraft, I don’t judge.
Crafting
There are new custom crafting recipes coming to the server. Check out the crafting page for more details!
Advancements
There are new custom advancements coming to the server. Check out the advancements page for more details!
Woah, I just got some déjà vue there. Anyways…
Hardcore World
Wait what? A hardcore world? Why yes, there will be a Hardcore server where you can die and lose your precious hours of work forever. It will launch a few weeks after the regular SMP server and it will get its own post with details on how to join. Yet another thing to be on the watch for.
This is perfect place for players who wish for a bit more of a challenge. This server does not have all the comforts of the regular SMP server, you must survive in pure vanilla Minecraft. Beg others to sleep through the night, deal with phantoms, fight mobs on hard mode. All this and the risk of losing it all if you die! What’s not to love?
Housekeeping
Whitelist Audit
I am performing a whitelist audit. Any username that is not spoken for by the map reset will not be added to the whitelist. If you miss the change to get your username on the whitelist before the server starts, do not worry. Message me and I will get you added once again!
Minecraft 1.17 is the first part of the Caves and Cliffs update. The server world will not be resetting until the second part is released.
Minecraft 1.17 – Caves and Cliffs Part I
Minecraft 1.17 is the first part of the Caves and Cliffs update. Much of the features have been delayed until the second part. The next update will feature all the changes planned for world generation, with all new underground cave and mountain generation and build height changes.
The world will not be reset until the second part of the update is released around the end of the year. The second part will drastically changes world generation. This will allow for all the changes to be fully utilized. To make use of the new features in 1.17 you will need to find new chunks. This should be fairly straightforward with the available world map.
To encourage exploration to the new chunks I will be sponsoring transportation systems to new chunks to help ease the burden of taking on such a large project. Contact me to submit your proposal for a transportation system and I will work out funding.
The server itself will update to Minecraft 1.17 once PaperMC has a functioning build. Until then it will remain on Minecarft 1.16.5. I will be posting on Discord once the server is updated.
This post is considered out of date. This may be for a number of reasons, for example: the information may be out of date, the topic may be irrelevant now, or simply that the post is quite old but I wanted to keep the history.
Minecraft is a very memory hungry game, and allocating more RAM can have a positive impact on performance. Here is a quick how-to guide.
Minecraft and RAM: Like a kid in a Candy Shop
But the kid is Minecraft and the candy is RAM
Minecraft is written in Java, which is an extremely powerful and versatile programming language, but it loves to hoard and use RAM. By default Minecraft only uses up to 2GB of RAM, which can hinder performance. One of the easiest ways to increase performance is to allocate more RAM to Minecraft. This will be a short guide to tell you how. First you will need to know how much RAM you currently have in your system, if you already know this skip ahead to the Allocating Memory section.
Checking in Windows
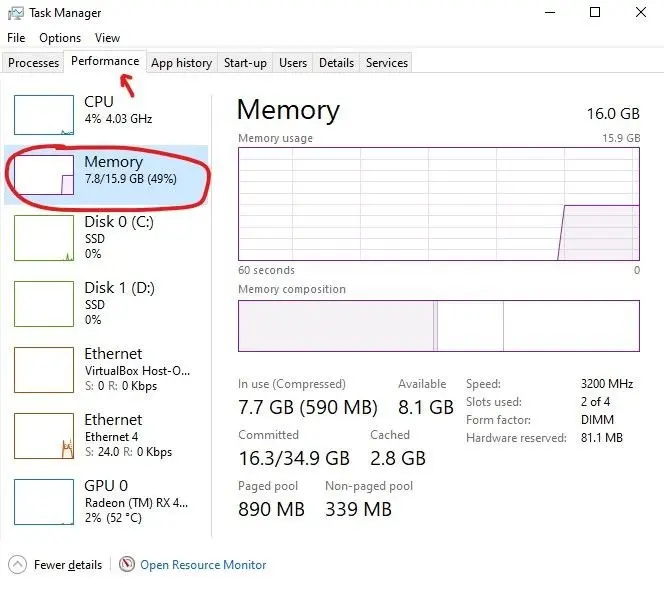
Open the Task Manager with Ctrl + Shift + Esc and look in the Performance tab under Memory.
The number on the right of the / is your total system memory.
Checking in MacOS
Open the Activity Monitor and click Memory. From there find Physical Memory, that should give you your total system memory.
Allocating Memory
How much should I allocate?
The answer to that question varies system to system based on the amount of RAM installed and how much is free for Java to use. The table below is a pretty good place to start though. Find your System RAM and then determine what performance level you would like. You can always go back and adjust after.
System RAM
Performance Level
Allocated RAM
8GB
Alright
4GB
8GB
Good
6GB
12GB
Good
6GB
12GB
Better
8GB
16GB
Good
6GB
16GB
Better
8GB
16GB
Best
10GB
16GB+
Good
8GB
16GB+
Better
10GB
16GB+
Best
12GB-20GB
How do I do it?
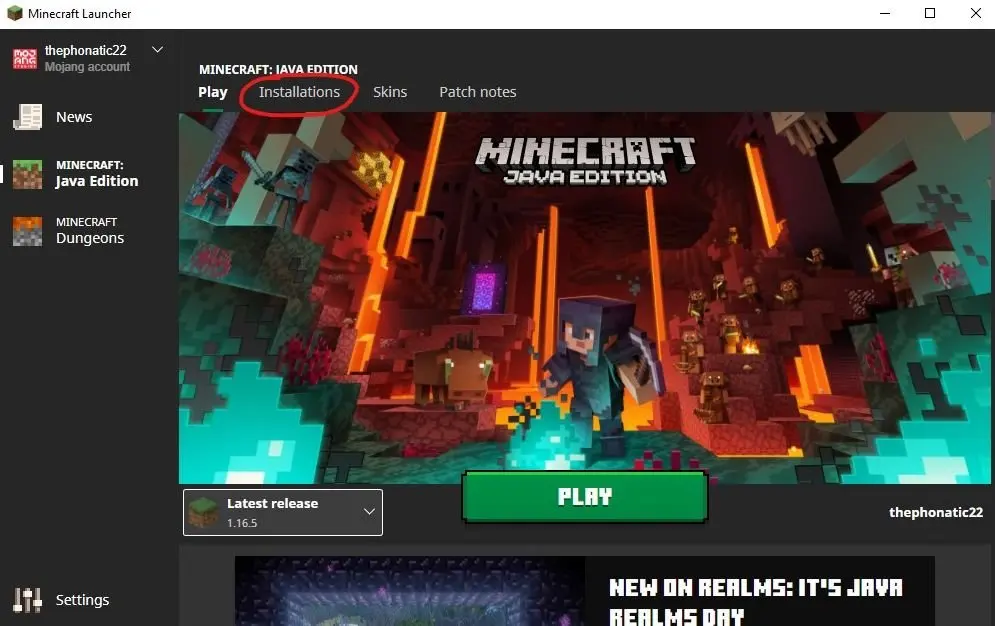
Open the launcher as normal and don’t click anything just yet.
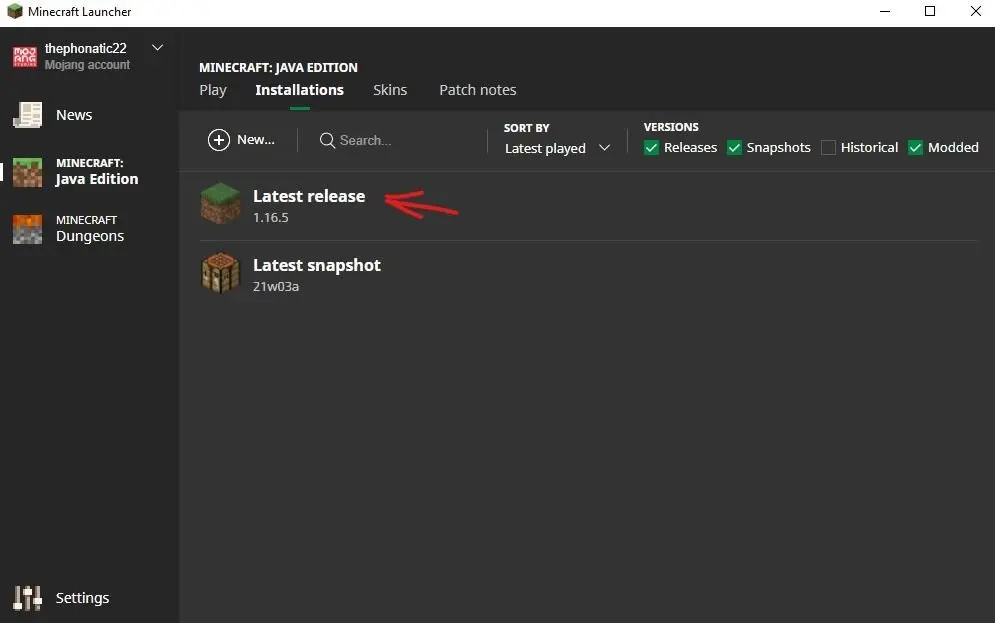
This will likely be called Latest Release
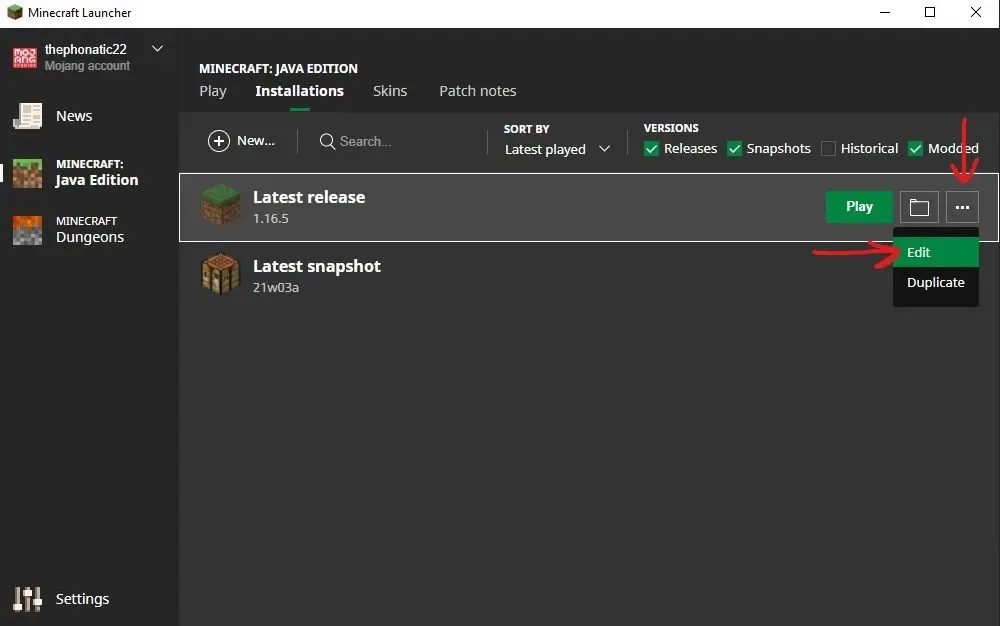
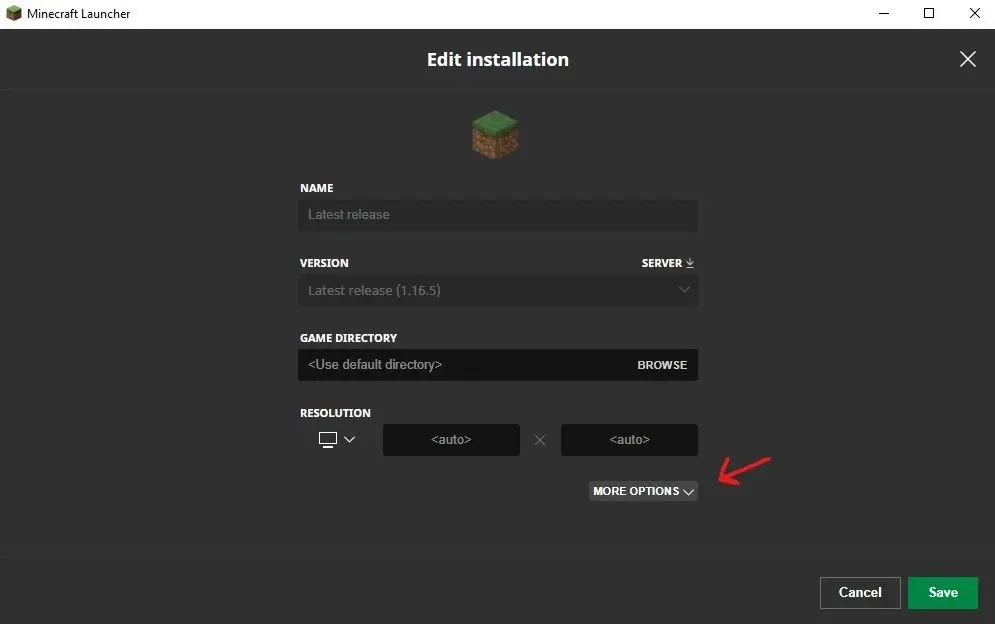
Open menu and click Edit
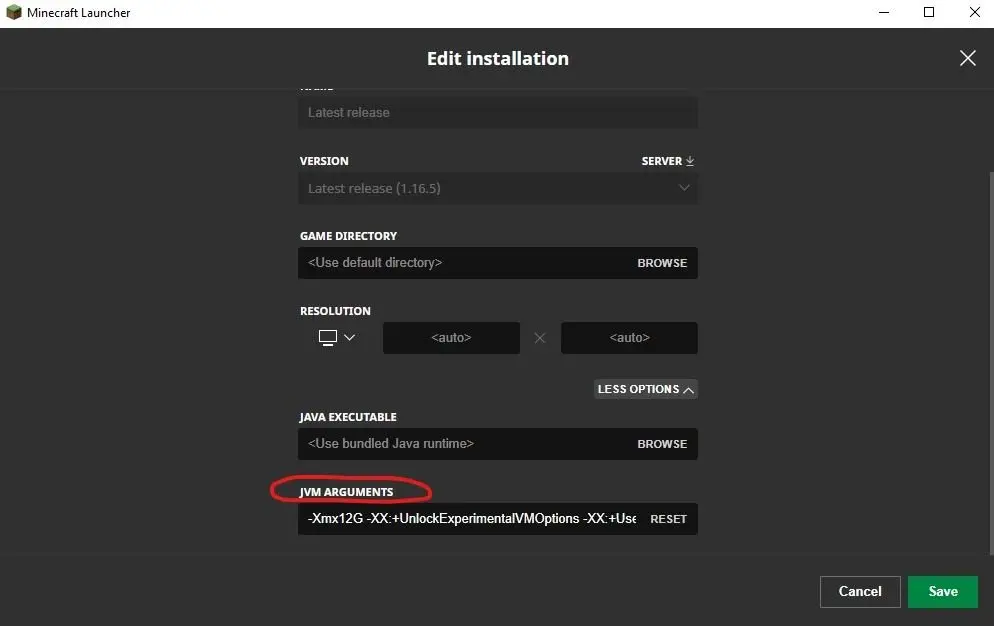
Expand the options and find JVM Arguments
I have mine set to 12GB already, but it will likely say 2GB
Replace the 2G after -Xmx with whatever amount of RAM you decided to allocate. For example if I were to allocate 12GB of RAM like I have already done I would simply type 12G and that would be all.
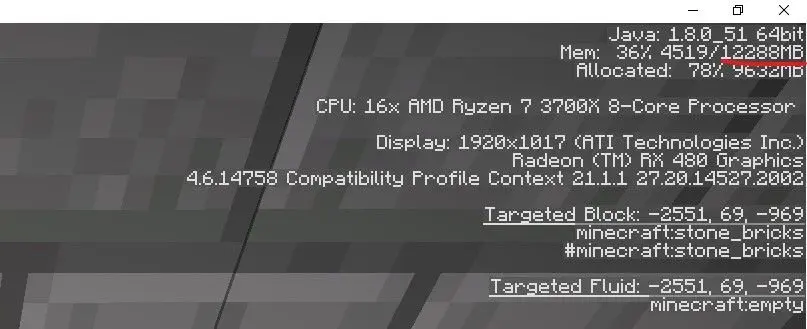
To verify that the RAM has been allocated launch the game and join a world or server and press F3 to open the debug menu.
Multiply the GB value you entered earlier by 1024 and it should be the same as the number after the /. If it is, your allocation change has worked!
Congratulations, you have successfully allocated more RAM to Minecraft, hopefully netting you more frames in the process. Now go mine those crafts.
This post is considered out of date. This may be for a number of reasons, for example: the information may be out of date, the topic may be irrelevant now, or simply that the post is quite old but I wanted to keep the history.
Using Waterfall Velocity, a Minecraft server proxy, you only need one address to be able to connect to multiple servers.
How to get between Minecraft Servers?
Using the new configuration I have combined all servers under one address and port so there is no need to have multiple TNTable servers in your list. I discuss the specifics later. For now I will just give you the commands to get around. They are also really easy to find on the server. At any time start typing “/server” and a list of autocomplete suggestions will come up with the available servers.
SMP
/server smp
UHC
/server uhc
Creative
/server creative
Waterfall
Waterfall is a fork on BungeeCord, a Minecraft server proxy. It takes BungeeCord and optimizes it further.
Note from the future
Waterfall is no longer being used, Velocity has replaced it. It provides the the same functionality with additional performance improvements.
What is a server proxy and why do I care?
A server proxy allows the addresses to be combined into one so that multiple servers are not needed in the list with multiple ports or extra configuration at a DNS level. Waterfall is advantageous for me as I can create additional servers and configure waterfall instead of worrying about additional ports needing to be opened and all the extra configuration that would otherwise be required. Travelling between servers is easy and it will remember which server you were in before logging out and place you back in there when rejoining.
Joining
The server address can be found in the TNTable Discord community. Ensure that you have given me your username before joining so that I may add your name to the whitelist. By default you will land in the SMP server but switching is a command away.
A new server! Huzzah! I will take you through the experience of building the new server and setting it all up to run the Minecraft server. I talk about the components that went into the server as well as my rationale.
Planning
This server upgrade has been planned for a few weeks now. Started with an ambitious goal to create a super server that could do it all, but then was reduced to an upgrade, but a significant one at that. The primary goal was to consolidate the two servers into one to make management easier and reduce power consumption. To make this happen I needed high-capacity hard drives for the media server component, an insane amount of RAM (I still wish I had more), and a super fast 1TB boot drive.
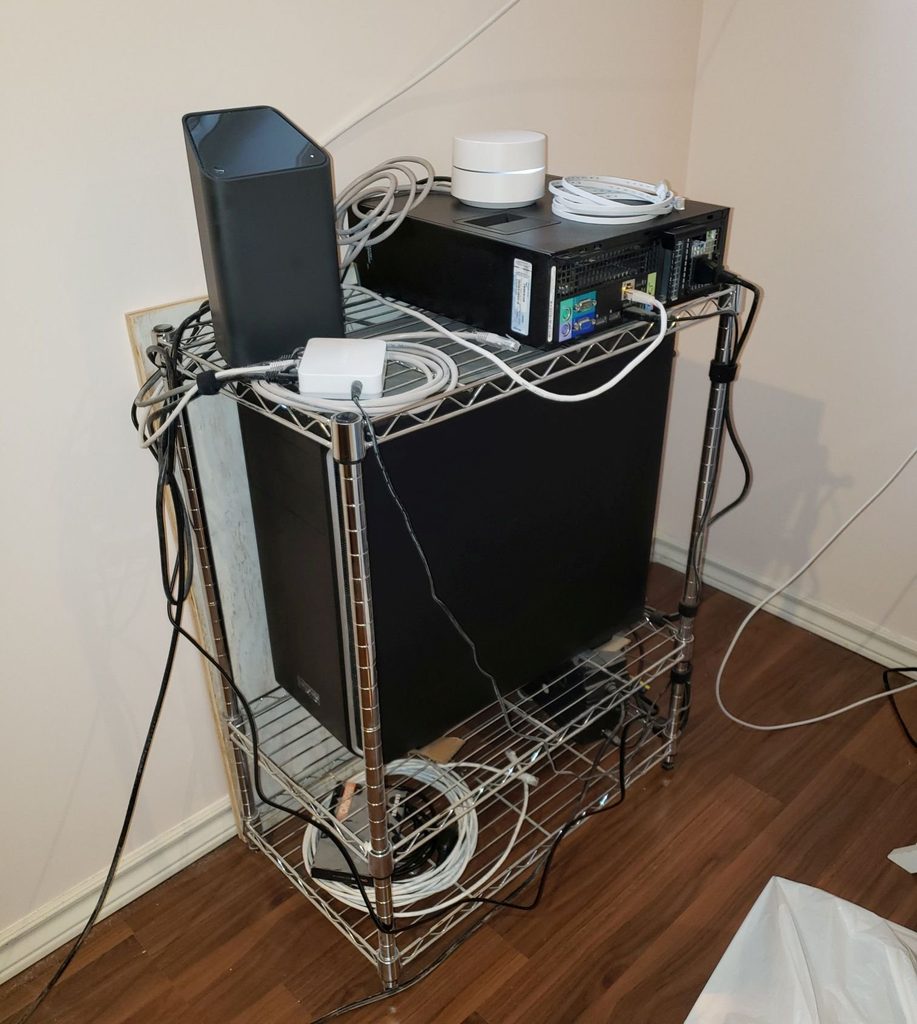
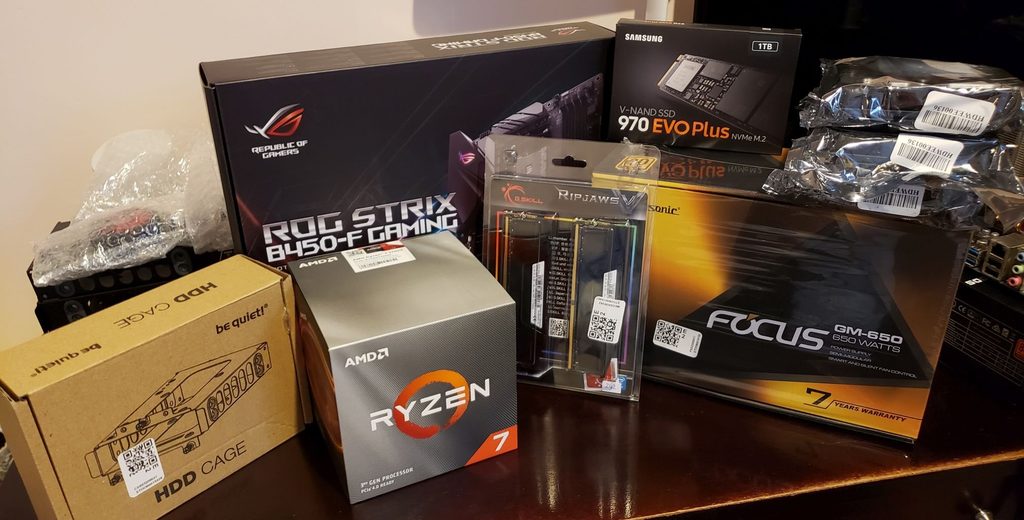
The current setup is rather janky, see the image below. It consists of two computers, one rocking a 3rd gen i7 from 2014, and the other rocking an Athlon from that same time period. The smaller Dell server handles the media serving as well as all the game servers, while the larger box with the Athlon is the bulk storage. These are being consolidated with a complete rebuild and upgrade in the be quiet! Pure Base 600 with 3 6TB WD Red drives, a Ryzen 7 3700X and a 1TB Samsung 970 EVO Plus NVMe SSD. This should provided enough power to host game servers and host a media server all at the same time.
The old server setup. It worked, but was not ideal.
If you are interested in the specs see this post where I announce the upgrade and discuss the parts.
Dismantling
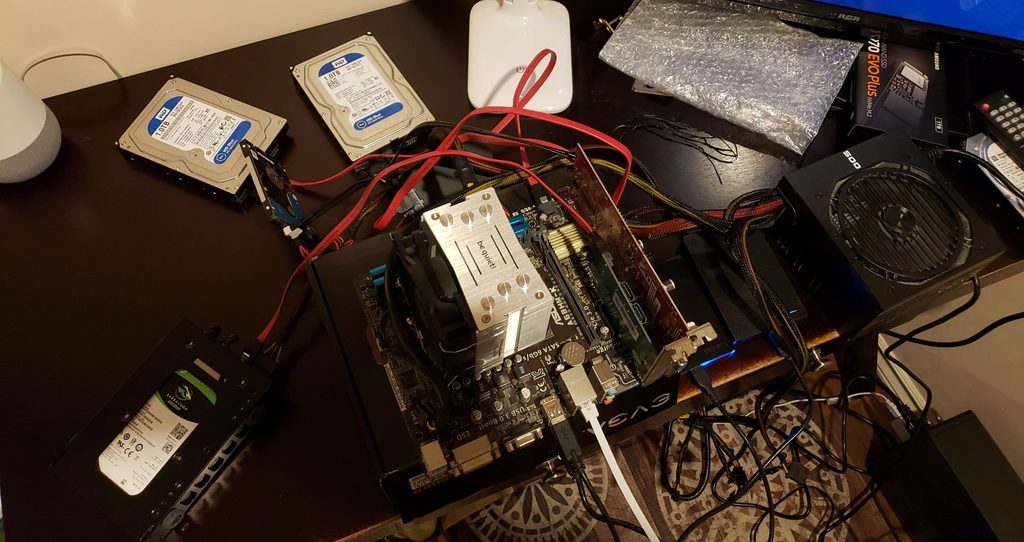
The first step was to dismantle the computer in the case I needed. Thankfully I could do this with minimal impact to the Dell server so only the services that relied on the storage would be down. It was extremely dusty. I needed it to be out of the case to build the new server in it, but I also needed it to run to get the data off. The result is what I like to call the jank bench.
Took the old components out of the case since I am reusing the case. It needed a good clean.
Cleaning
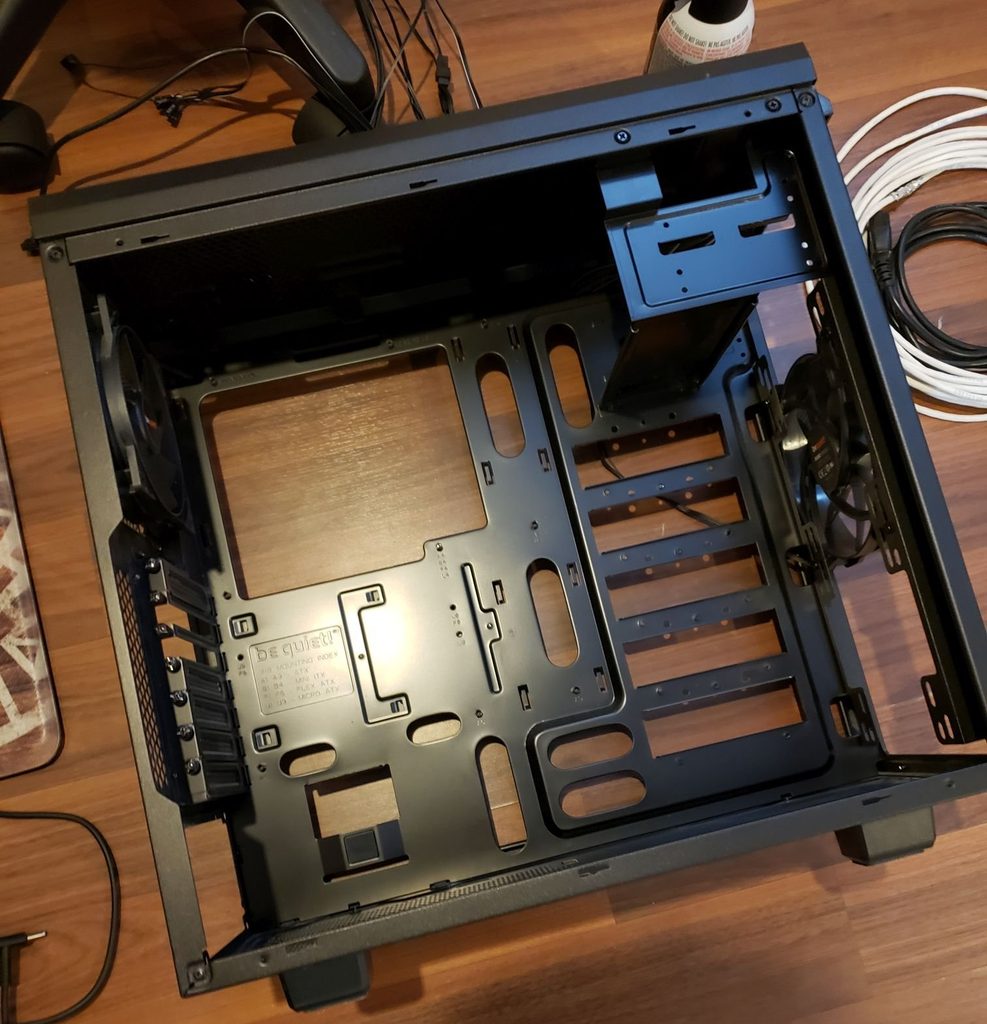
Like I mentioned, the case was extremely dusty, as well as all the parts. I did not care so much about the parts but the case needed a good cleaning. I got to work with compressed air, a vacuum and a microfibre cloth.
Drywall mud dust got everywhere, even with plastic sheets.
Looks brand new again. Used to be covered in dust like above. Not great for a computer.
Building/Upgrading
The new residents of the be quiet case.
First step was to assemble the new server outside the case to ensure everything worked.
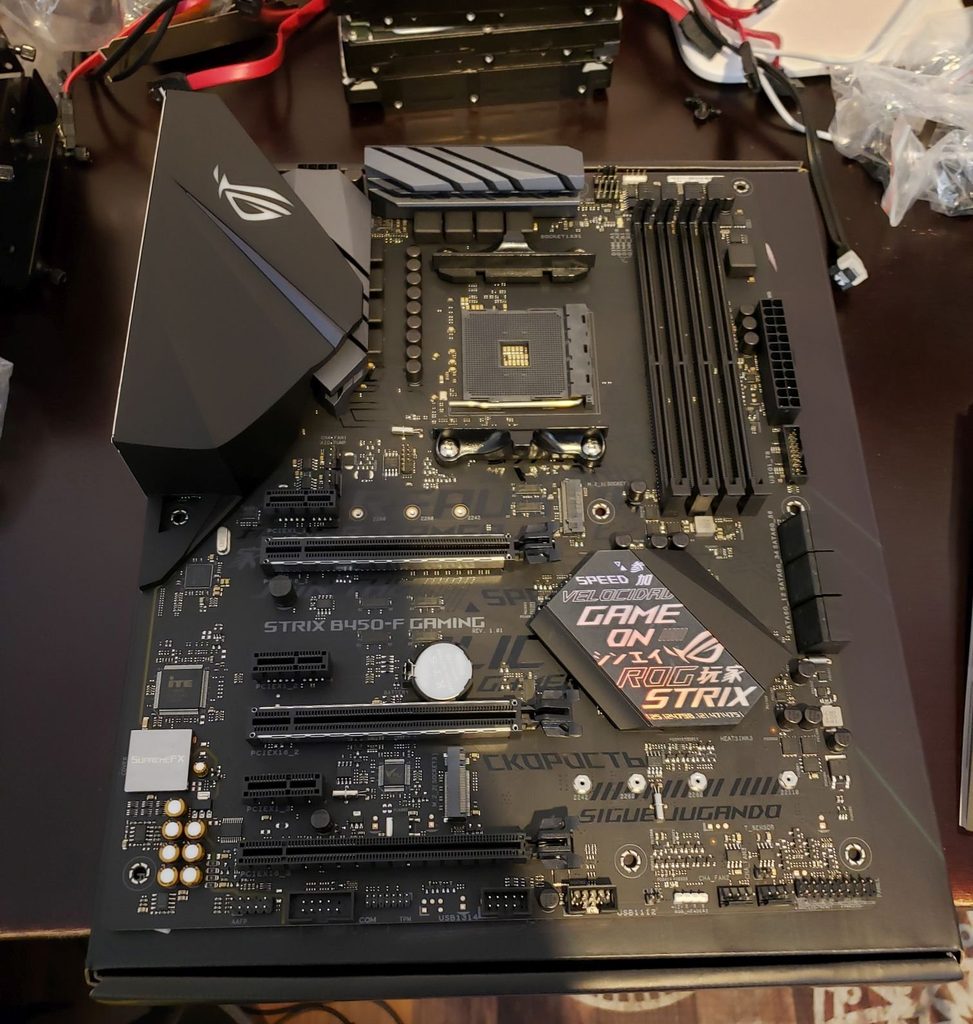
Motherbaord out of and on top of the box. On a non-conductive surface.
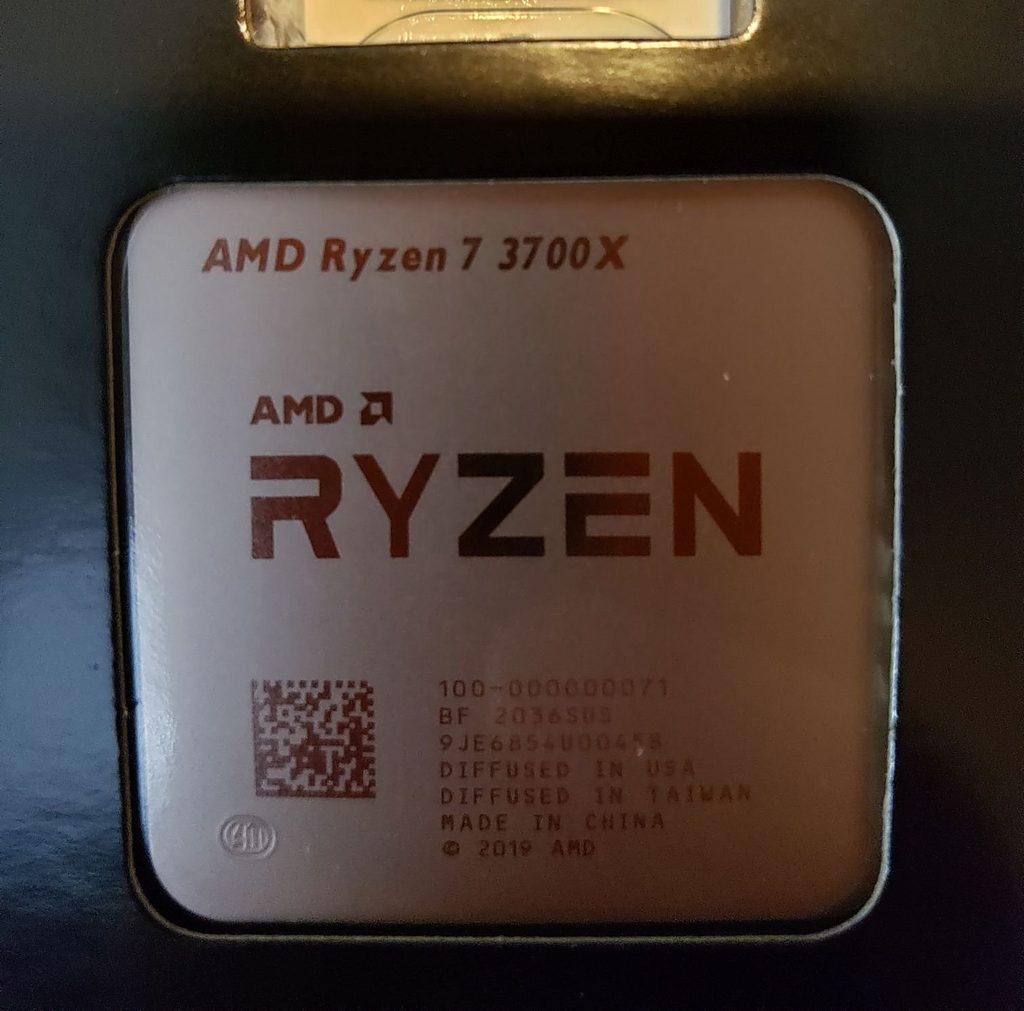
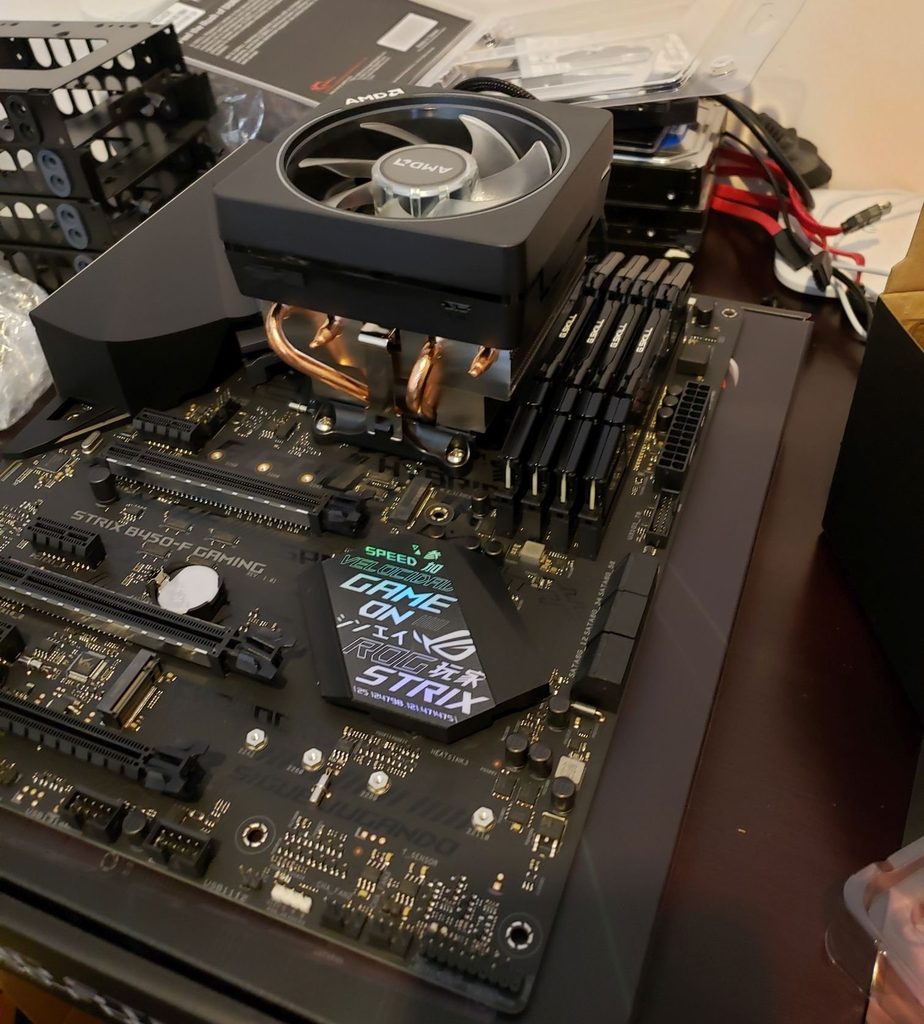
The CPU, it is a beast for the price.CPU, cooler and RAM installed. It is beautiful.
I got everything else in an assembled and it was time to POST (Power On Self Test). Will I get it on the first try?
The answer is yes, I got it first try. Blurry photo because I was excited.
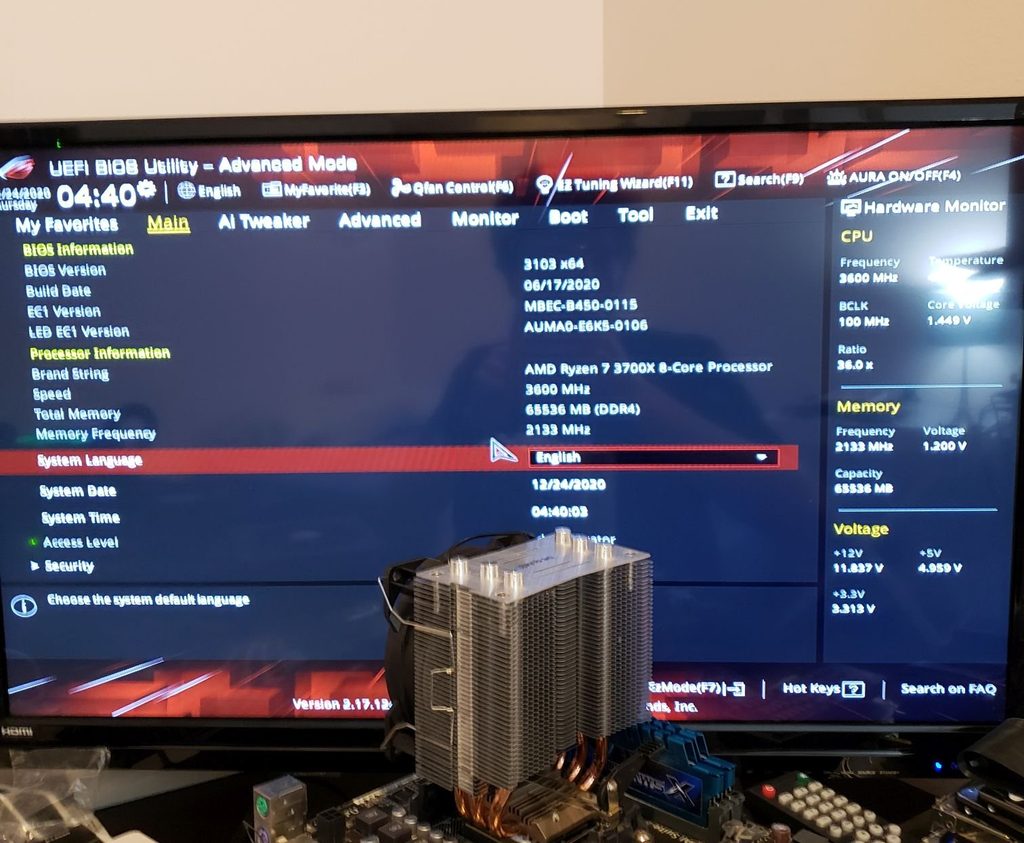
Needed to adjust a bew of the BIOS options for my RAM and CPU but everything was recognized as expected. The server is alive!
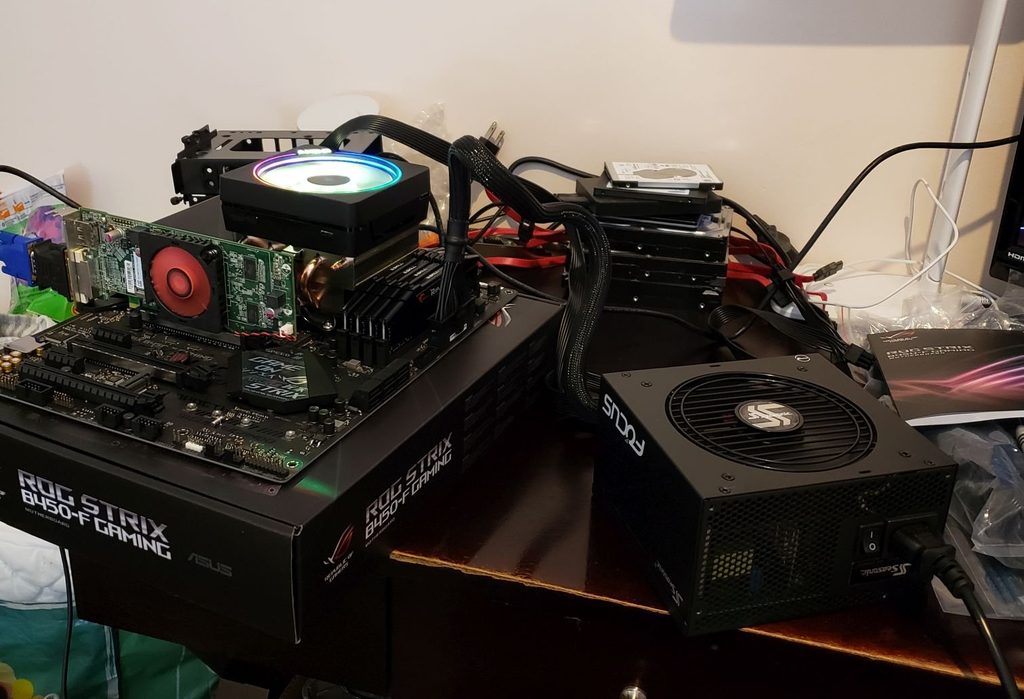
Here is the full setup out of the case. Janky but pretty.
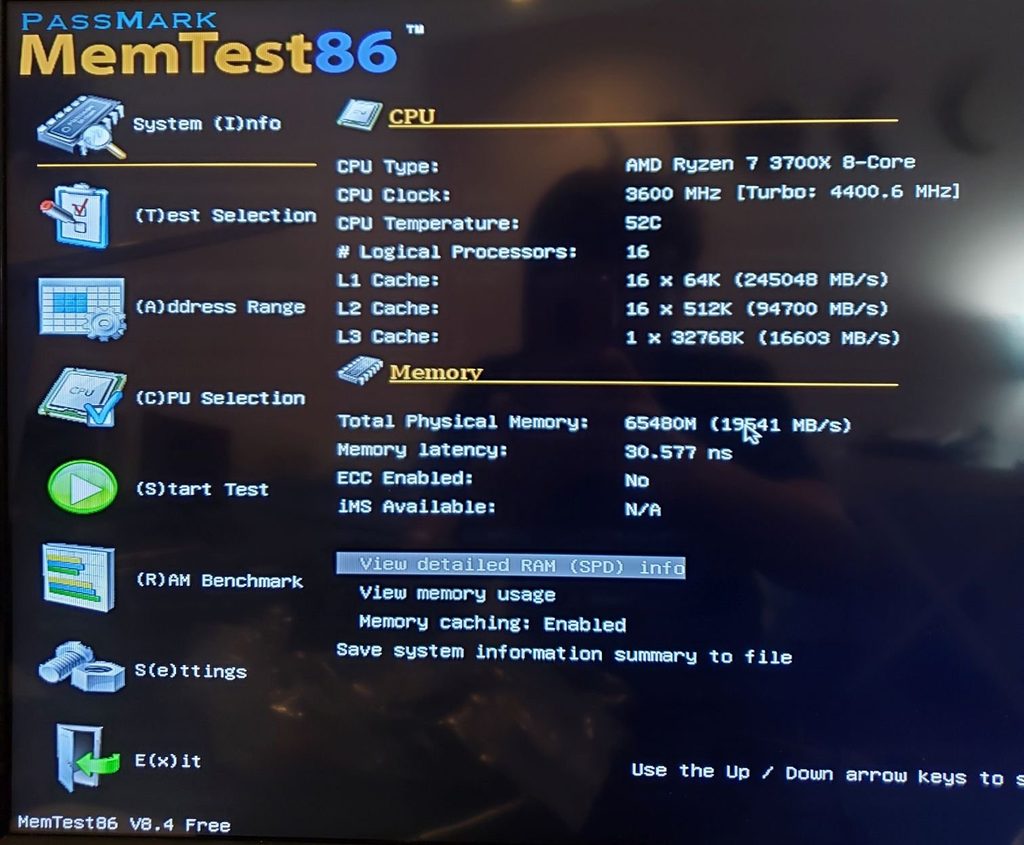
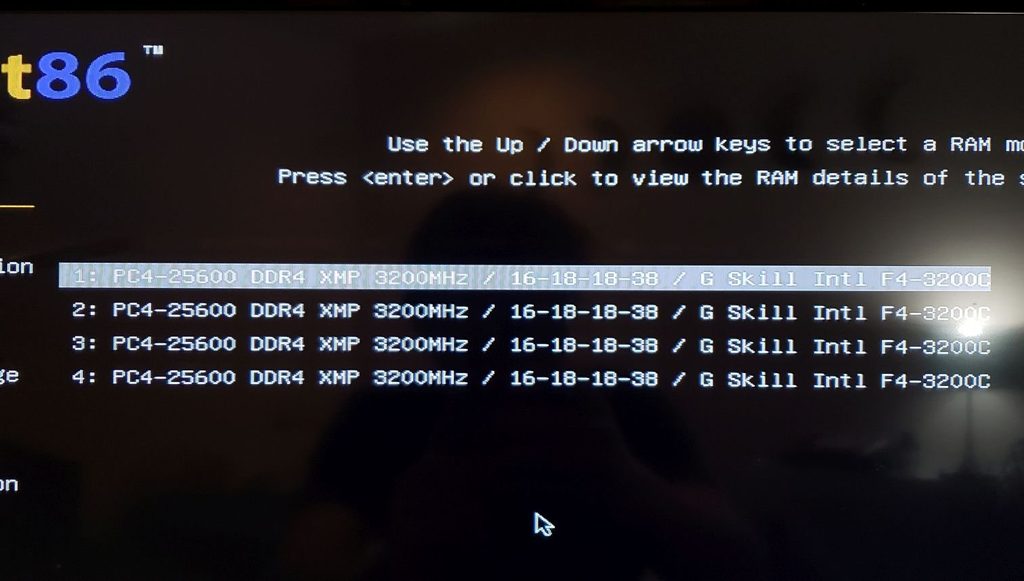
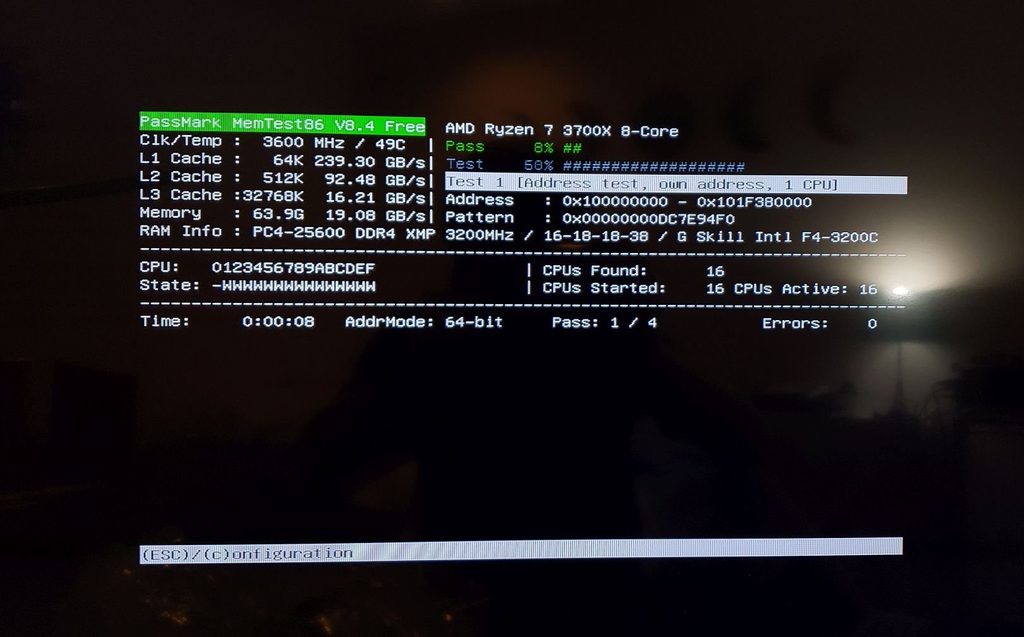
Now I wanted to make sure that everything was working properly so I ran a RAM test to ensure that all 64GB were behaving correctly. This took about 10 hours.
Memtest x86 is a free program that tests RAM for errors.RAM Specs. Pretty intense.Running the test. Came back 10 hours later with no errors.
Animal Crossing Break
On Christmas Eve I took a small Animal Crossing break to enjoy the Toy Day event while the test ran. Plus I needed a small break. Toy Day was quite fun.
Installation/Setup
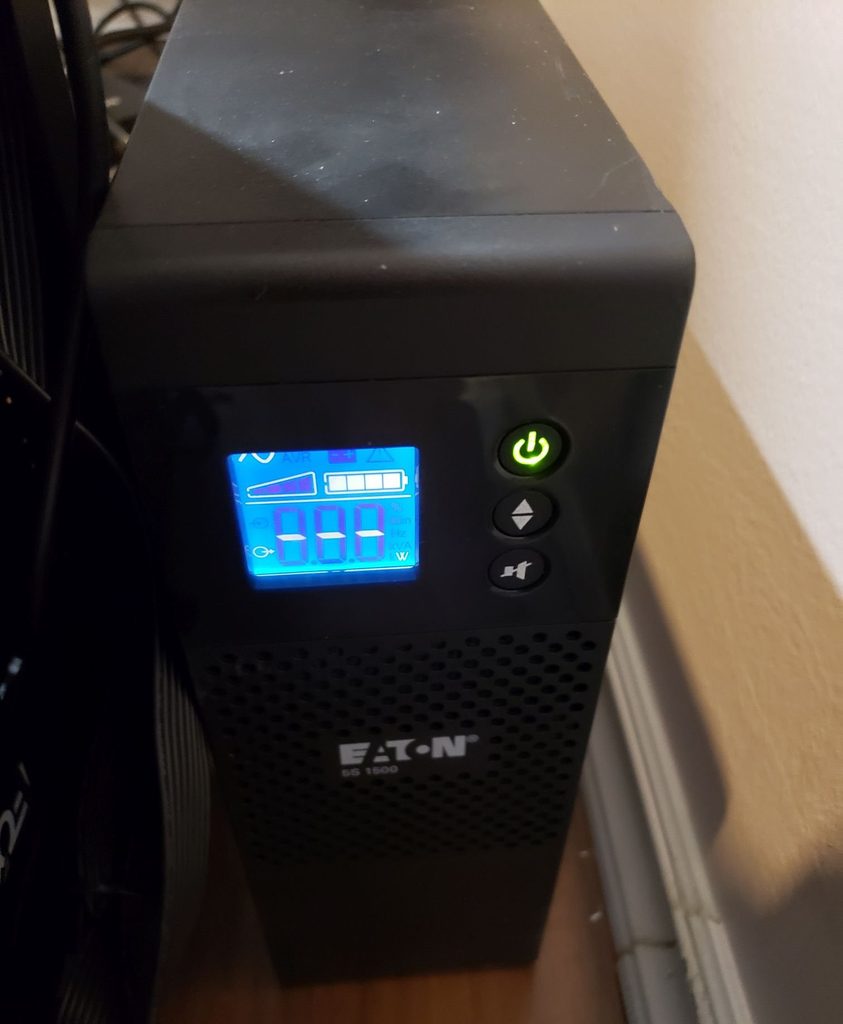
Can’t forget to ensure that the server receives clean and consistent power, especially in the event of a power failure. Got a new to me Eaton UPS. This should be able to power the server for between 30-60 minutes depending on the load.
It is very heavy.
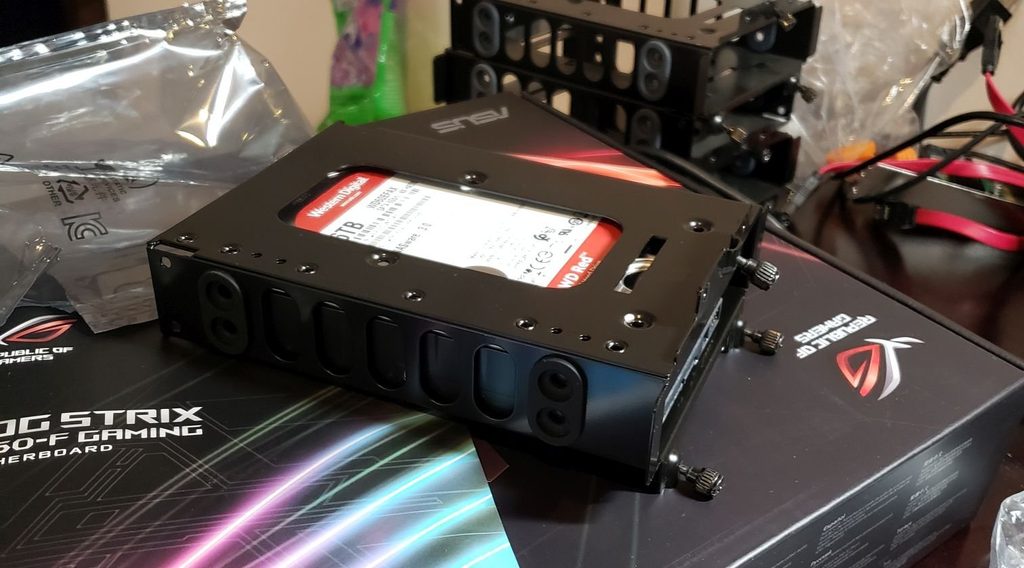
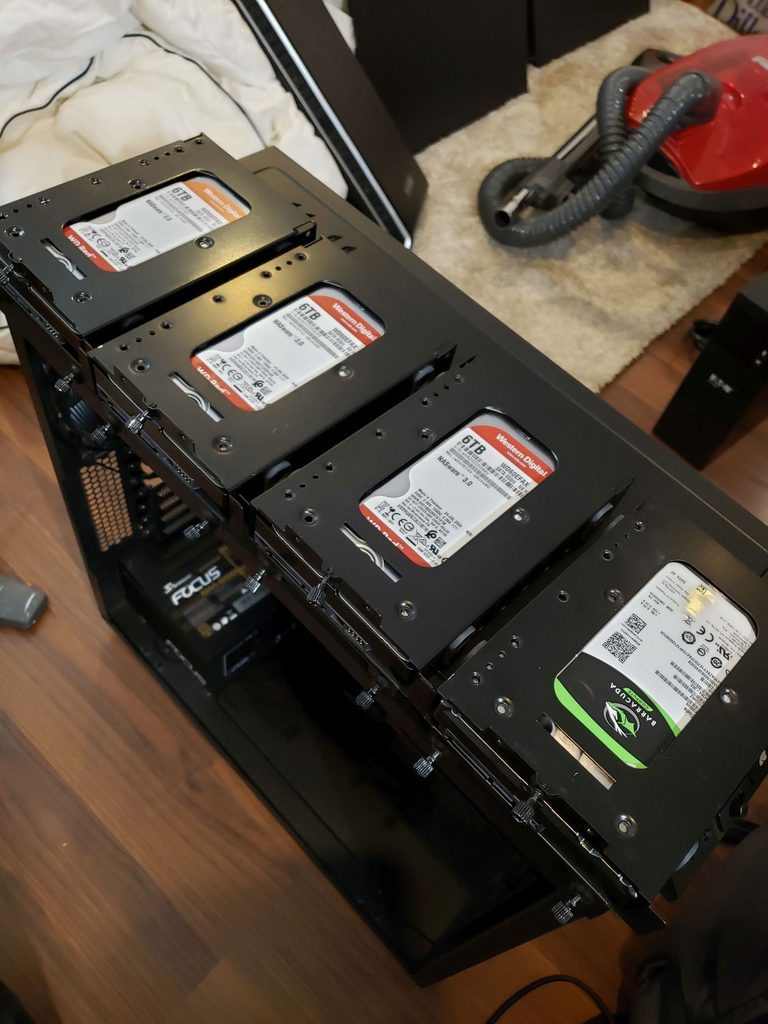
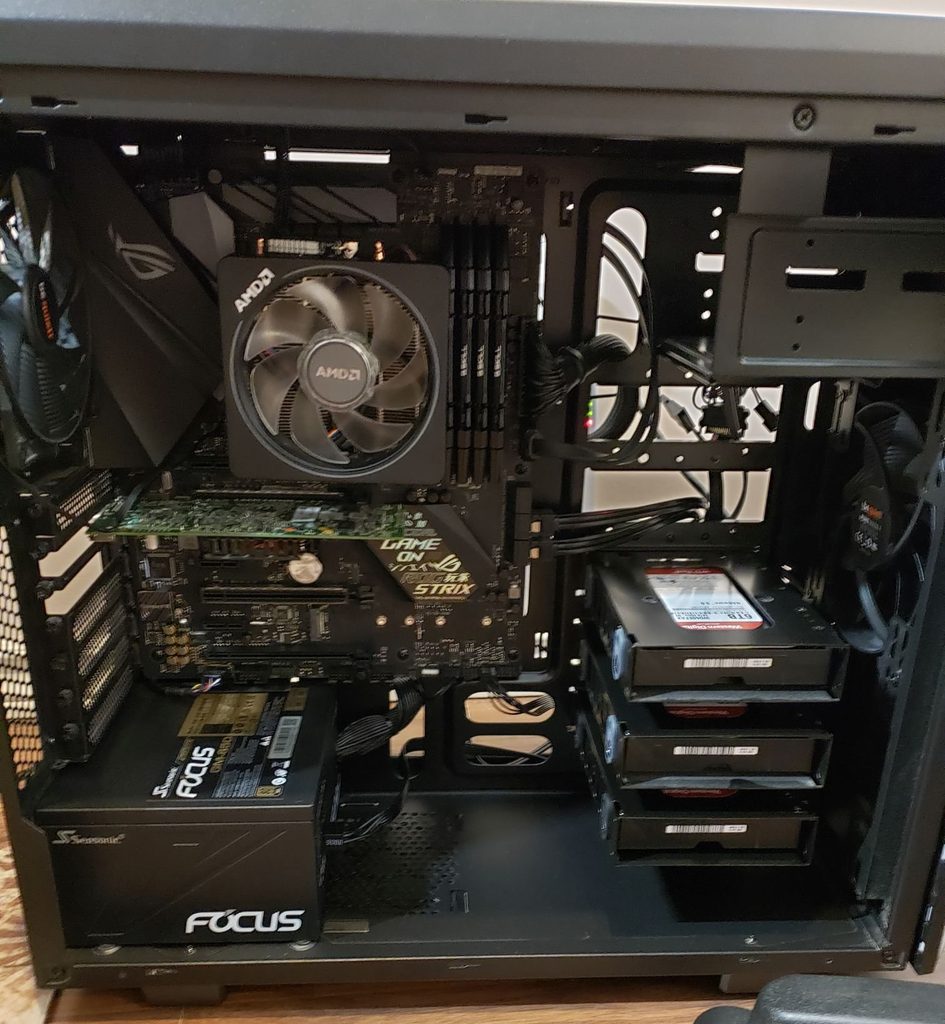
Next up is to get all the hard drives in their caddies and then get everything into the case. It is getting exciting as we get closer to completion.
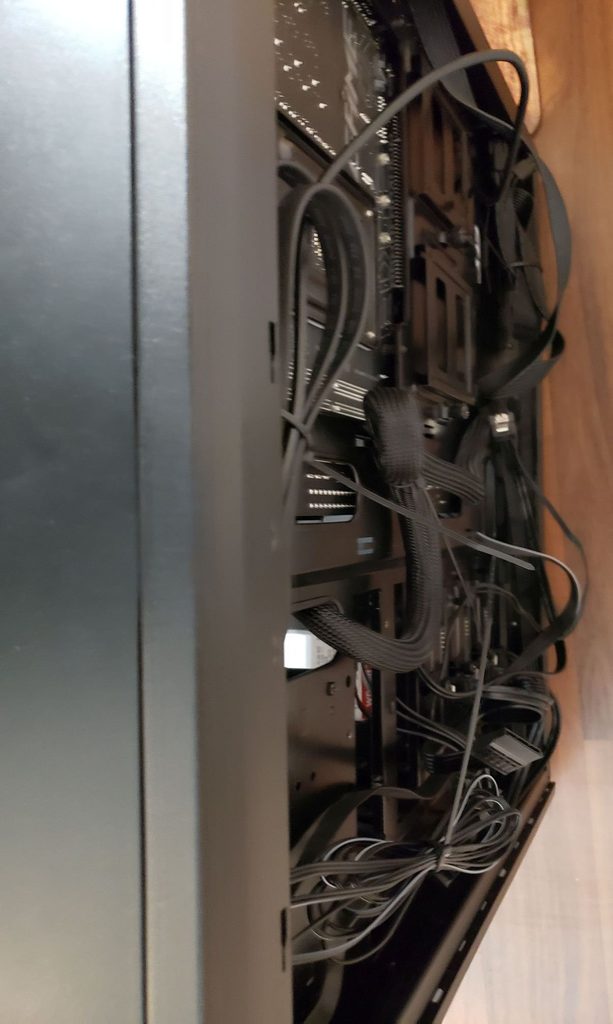
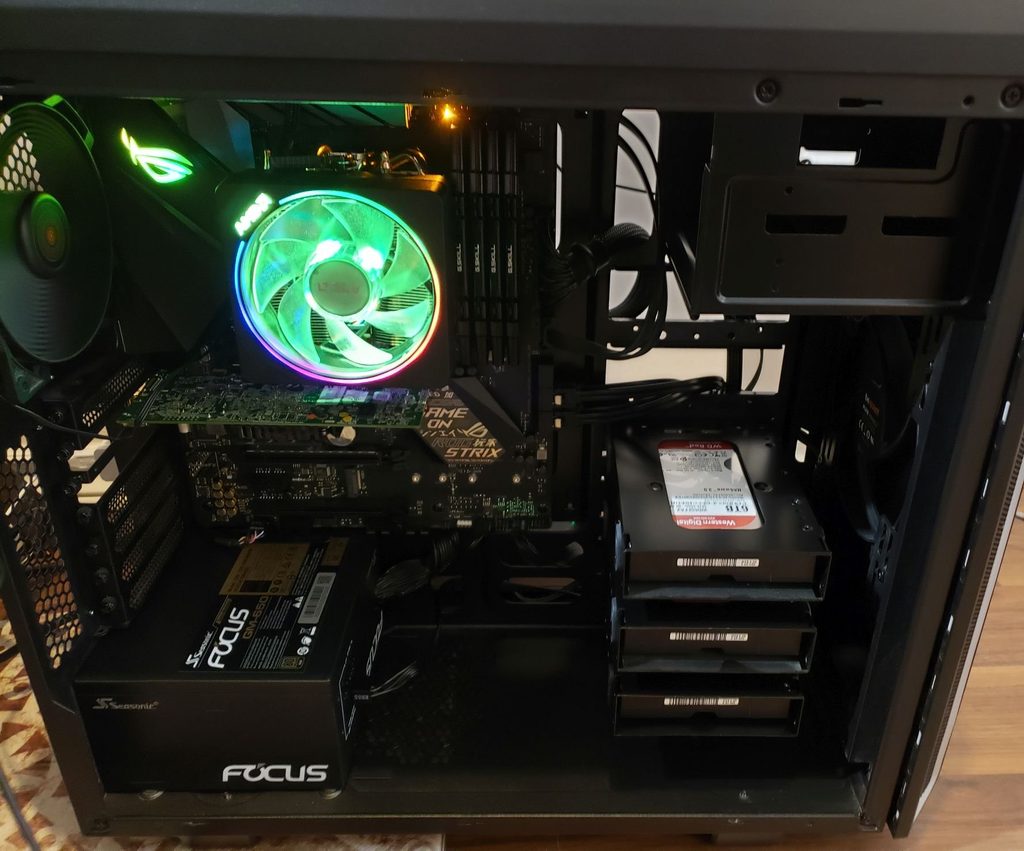
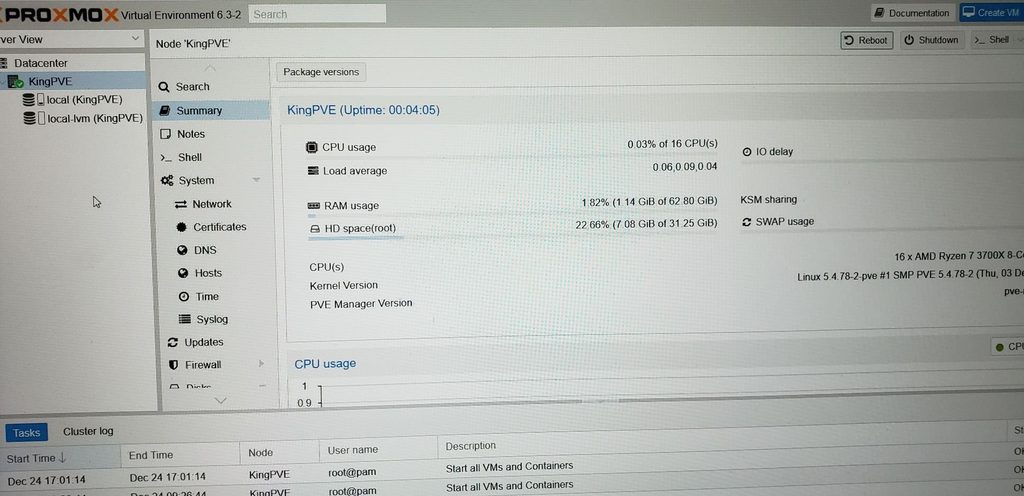
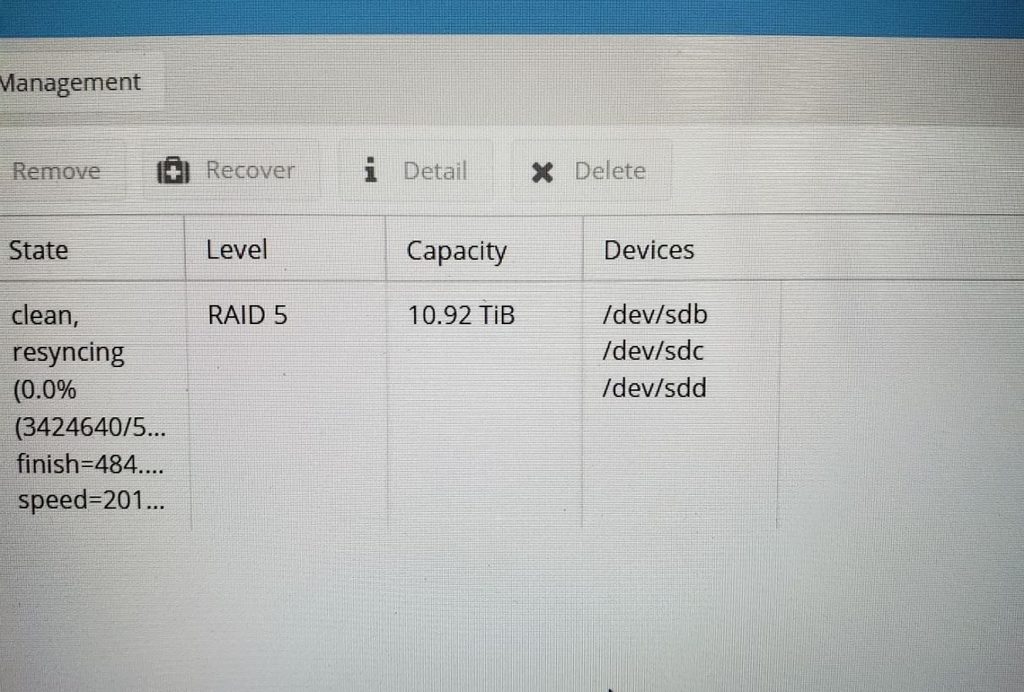
One down, 3 more to goThey are beautiful. The Reds are for the media storage and brand new, the green and black is for backups and is being reused from the old server.Everything is in the case now!Decent cable management job. Not the neatest but the panel slides on easily which was the goal.It’s alive! Now I can start the setup and transfer of all the data from the old servers.Proxmox, the hypervisor of choice to run everything in virtual machines to make this a multipurpose server.Running OpenMediaVault in a VM to provide the data pool. Nearly 11TB with redundancy for media.
Final Thoughts
I hope you enjoyed reading my little write up about the server upgrade. It was certainly a lot of fun for me. I am very excited for the upgrade and to test the limits of the new hardware. Obviously everything will be run within a virtual machine or container so there will be minor overhead but it isn’t that much of an issue with modern hardware. If you have any questions or want more info let me know and I am happy to talk about it and answer questions. Now I have to pay my dog tax.
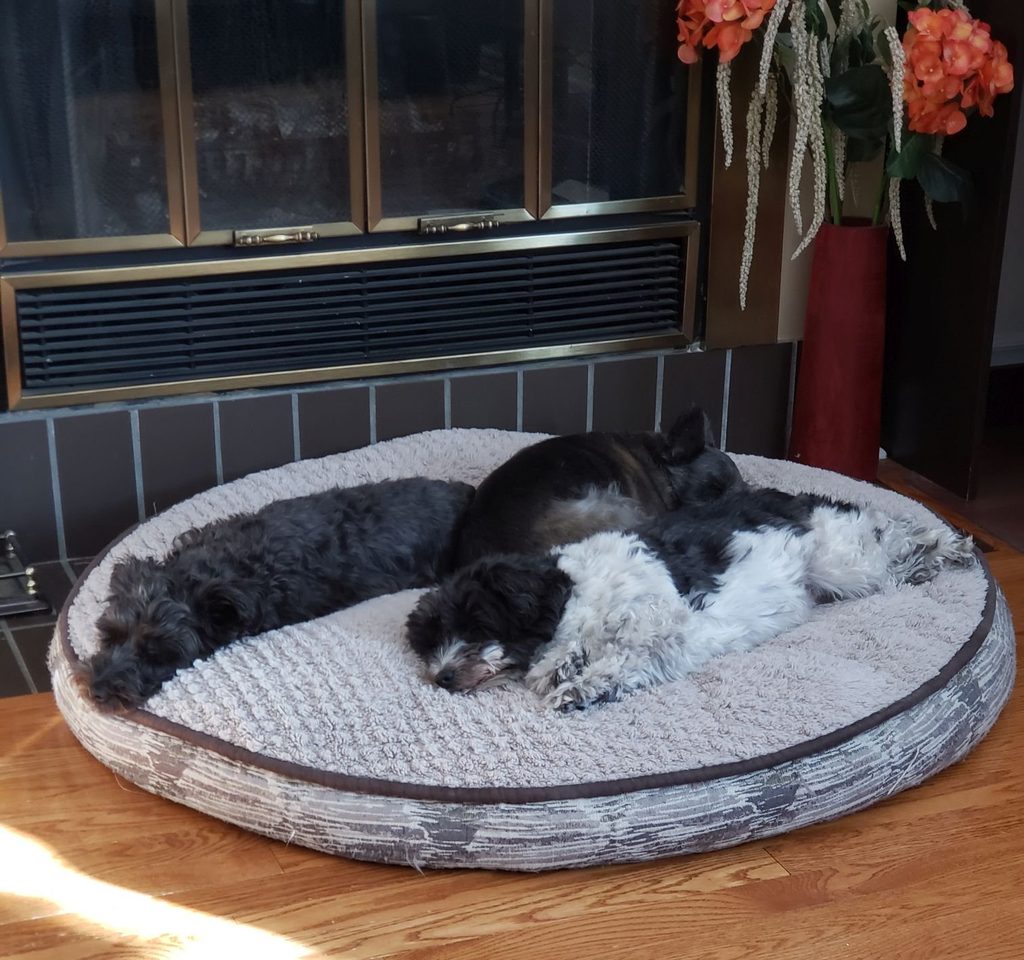
Dog Tax
These fluff balls kept me company while I worked on the server and took breaks and whatnot. They are going to miss me when I go back home.
A new server, updated website backend, more map storage!
Hello everyone, I have some exciting news, or at least it is exciting for me. This post is kind of a collection of smaller insignificant news bits all rolled into one, so enjoy.
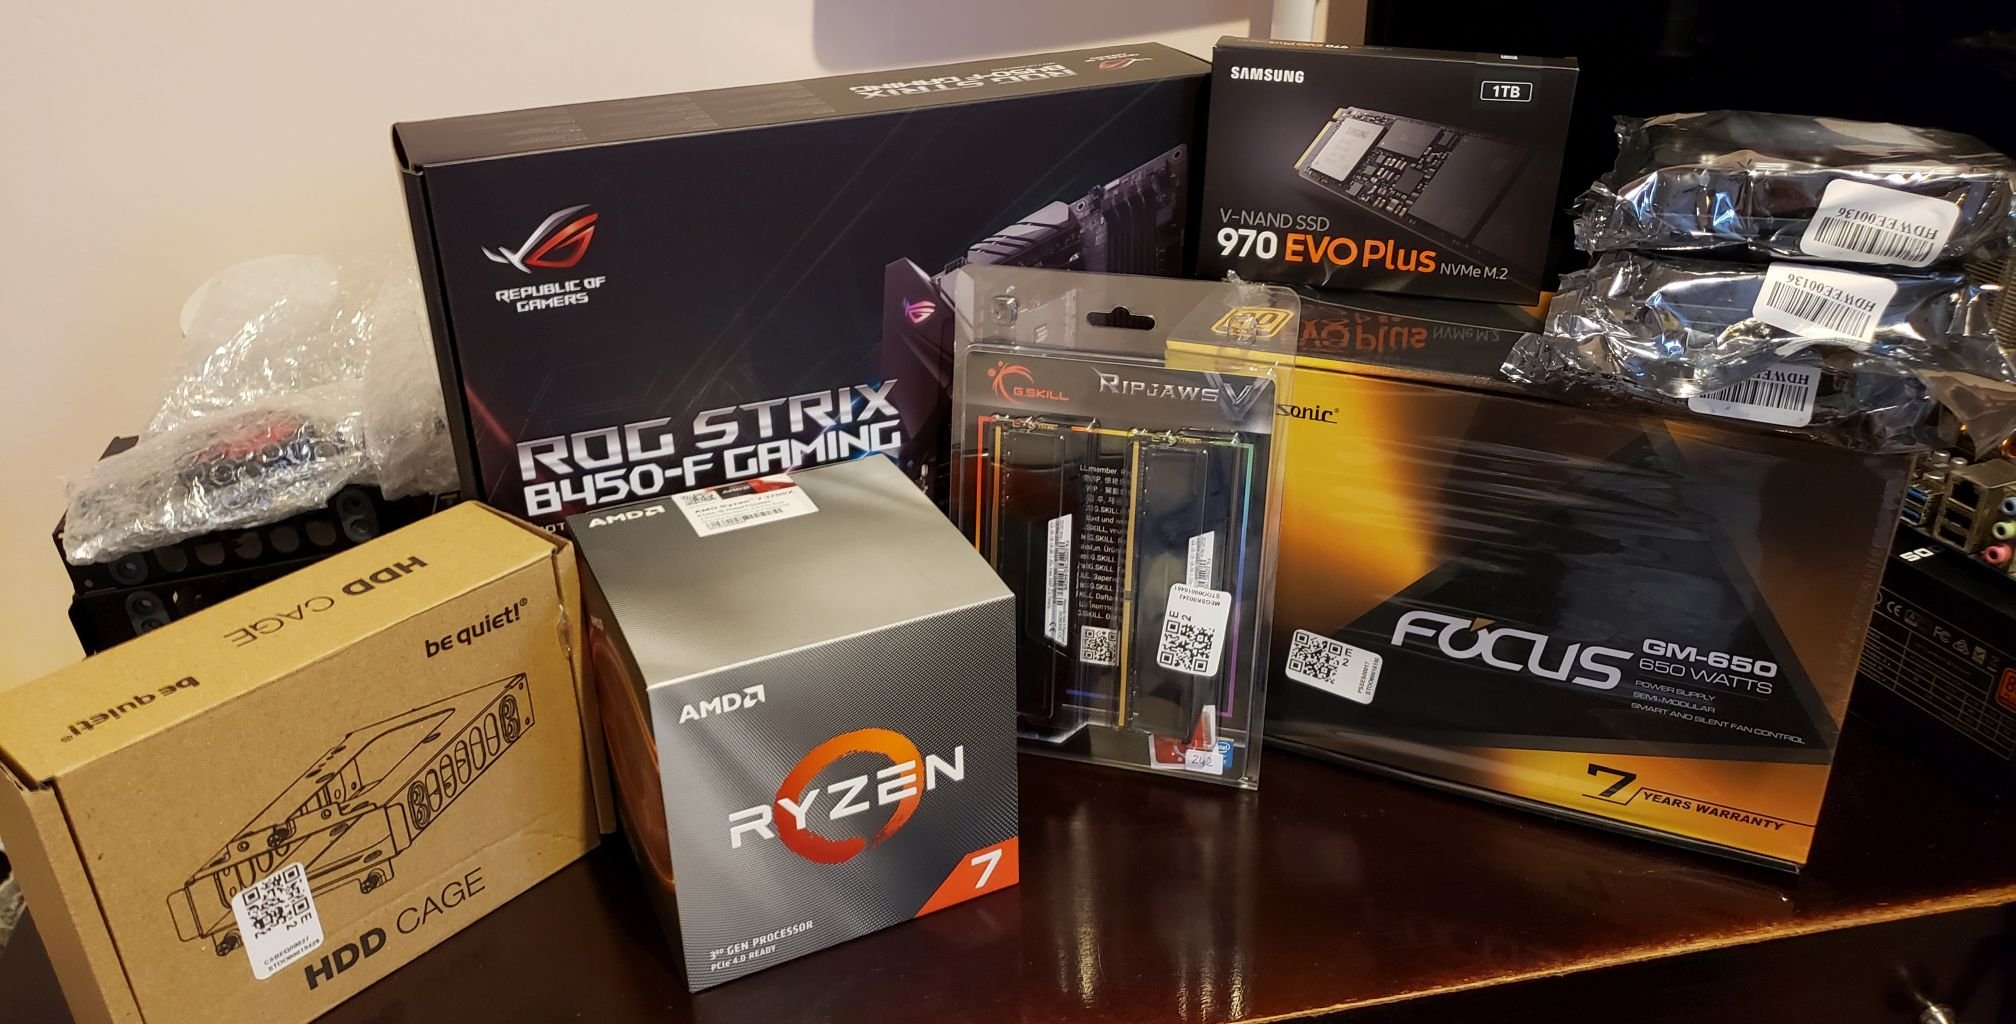
First of all, and most exciting; I am building a newer, more powerful server. I hope you all like the poorly drawn on image I have included. This is fantastic news as it means the Minecraft server will have more power, and I will be able to run many more game servers upon request. For those that like the nitty gritty of computers I will include a parts list below as well the internet connection information. However this does mean there will be some downtime over the holiday season. I will post to Discord when this can be anticipated and how long it is expected to last. Please keep an eye out for that.
Second of all, the website’s backend has been updated. This may not mean much for any of you, but it means a lot for me. You may notice marginally improved performance but it is likely imperceptible. It mainly makes my life easier, and I have figured out automatic deployment of updates. Please note however that the night mode colours are still being tweaked so bear with me on that.
Third of all, the maps are now all finally available for your viewing and nostalgic pleasure. For those interested I have moved them from a file server on a VPS into an Object Storage bucket on Linode. This does mean incurring a monthly cost but it allows me to have all the map renders available, and know that the data is safe, so it is worth it for me. Please check the past maps out and feel free to share screenshots of anything that you find. I plan on migrating the current server map over to Linode as well but that won’t get its own post.
If you made it this far, thanks for reading! Have some server specs. These are subject to change and will be updated accordingly.
Server Info
Part List
Part
Product
CPU
AMD Ryzen 7 3700X – 8 Cores 16 Threads @ 65W
Motherboard
ASUS ROG STRIX B450-F GAMING
RAM
G.Skill Ripjaw 64GB (4x16GB) 3200Mhz CL16 (32GB available for games)
Storage
Samsung 970 EVO Plus 1TB NVMe SSD
Additional Storage
3x 6TB WD Red HDD (NAS)
Case
be quiet PURE BASE 6 (Reusing an Old Case)
PSU
be quiet PURE BASE 6 (Reusing an Old Case)
UPS
Eaton 5S 1500VA 900W (Runtime to be estimated after build)
Last Updated December 14th, 2020
Uplink Info
Copper Coaxial Cable Connection (I wish it was fibre but oh well)
This post is considered out of date. This may be for a number of reasons, for example: the information may be out of date, the topic may be irrelevant now, or simply that the post is quite old but I wanted to keep the history.
In order to facilitate the demand for phantom membrane; and to please those who do, and no not support phantoms; they will be enabled between the hours of 10:45PM and 6:45AM on the server. Phantoms begin to spawn after it has been an hour since your last sleep, this may be checked in Statistics under Time Since Last Rest.
In addition, the multiplayer sleep datapack has been updated to the latest version and now requires that 50% of the players on the server be sleeping before it passes the night. This is to alleviate some of the issues when only one player is required to sleep. A pop-up also appears now to warn other players when another is sleeping.
Phantoms slowly increase their spawn rate the longer since your last rest. They will spawn in groups of 1-3. It must be nighttime or a thunderstorm and players must be above sea level (y64). Read more about phantoms here.
The Minecraft SMP server has seen an increase in players since the map reset occurred. As such, it is time a new moderator was added to the servers to help me manage them.
It is my pleasure to welcome Angus to the moderation team. He has been a member of the community for a couple of years now and contributes positively to the community.
I would also like to take this time to explain the role of the moderators on the TNTable server. A moderator is primarily a player, with the ability and authority to intervene in conflicts that affect the server. They are eyes and ears on the server to prevent problems before they occur. Commands are used in rare circumstances and are largely investigative. Rarely do commands get used to give players items or bonuses of any kind. Moderators do not exist to make player’s lives easier. They exist to make managing the server easier.
That being said, we are always open to listening to appeals for help. If you have any questions we are happy to answer and help. If you would like to get into contact with us, please reach out on Discord, either through a private message or say hi in the contact-a-mod chat and we will reach out.