Guide: How to Allocate Additional RAM to Minecraft
Plus some tips on to how much RAM to allocate
Minecraft is a very memory hungry game, and allocating more RAM can have a positive impact on performance. Here is a quick how-to guide.
Minecraft and RAM: Like a kid in a Candy Shop
But the kid is Minecraft and the candy is RAM
Minecraft is written in Java, which is an extremely powerful and versatile programming language, but it loves to hoard and use RAM. By default Minecraft only uses up to 2GB of RAM, which can hinder performance. One of the easiest ways to increase performance is to allocate more RAM to Minecraft. This will be a short guide to tell you how. First you will need to know how much RAM you currently have in your system, if you already know this skip ahead to the Allocating Memory section.
Checking in Windows
Open the Task Manager with Ctrl + Shift + Esc and look in the Performance tab under Memory.
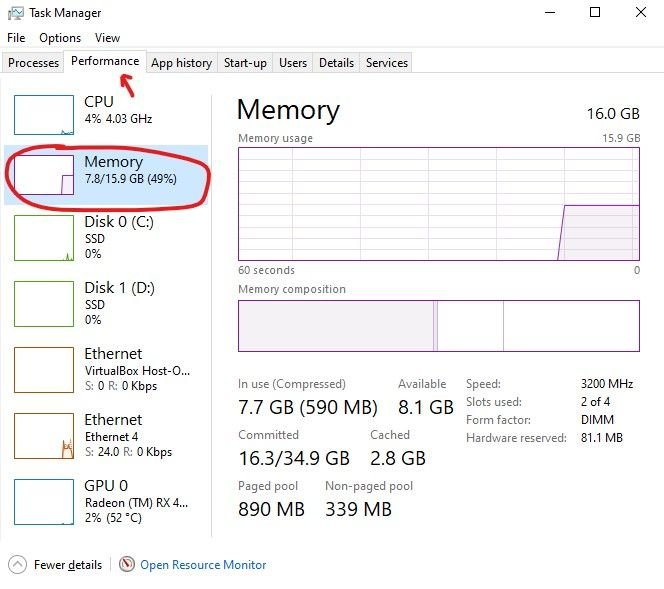
The number on the right of the / is your total system memory.
Checking in MacOS
Open the Activity Monitor and click Memory. From there find Physical Memory, that should give you your total system memory.
Allocating Memory
How much should I allocate?
The answer to that question varies system to system based on the amount of RAM installed and how much is free for Java to use. The table below is a pretty good place to start though. Find your System RAM and then determine what performance level you would like. You can always go back and adjust after.
| System RAM | Performance Level | Allocated RAM |
|---|---|---|
| 8GB | Alright | 4GB |
| 8GB | Good | 6GB |
| 12GB | Good | 6GB |
| 12GB | Better | 8GB |
| 16GB | Good | 6GB |
| 16GB | Better | 8GB |
| 16GB | Best | 10GB |
| 16GB+ | Good | 8GB |
| 16GB+ | Better | 10GB |
| 16GB+ | Best | 12GB-20GB |
How do I do it?
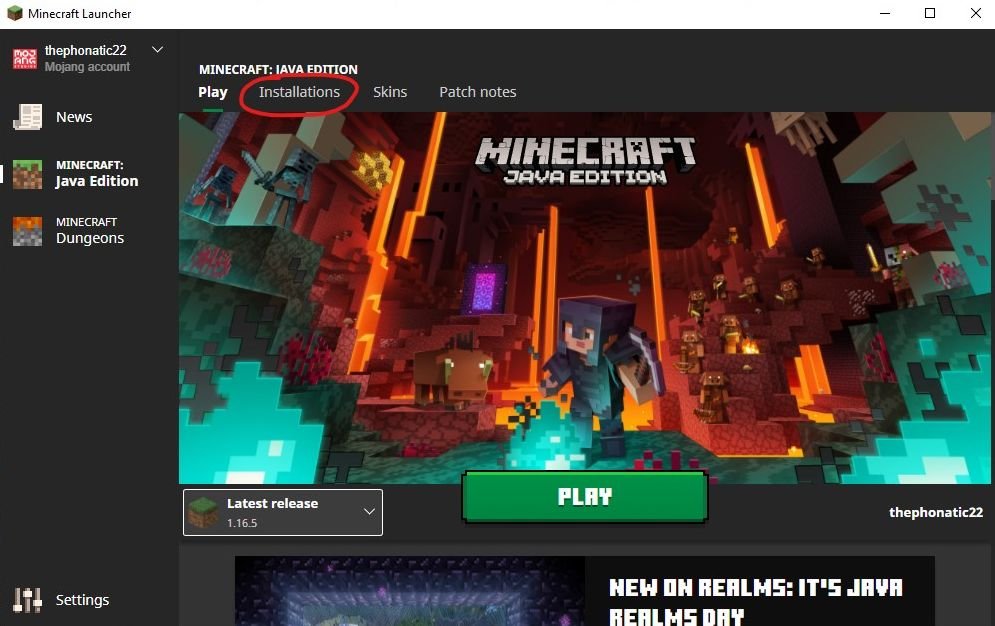
1. Open the Minecraft Launcher
Open the launcher as normal and don't click anything just yet.
2. Click on Installations
3. Locate your installation
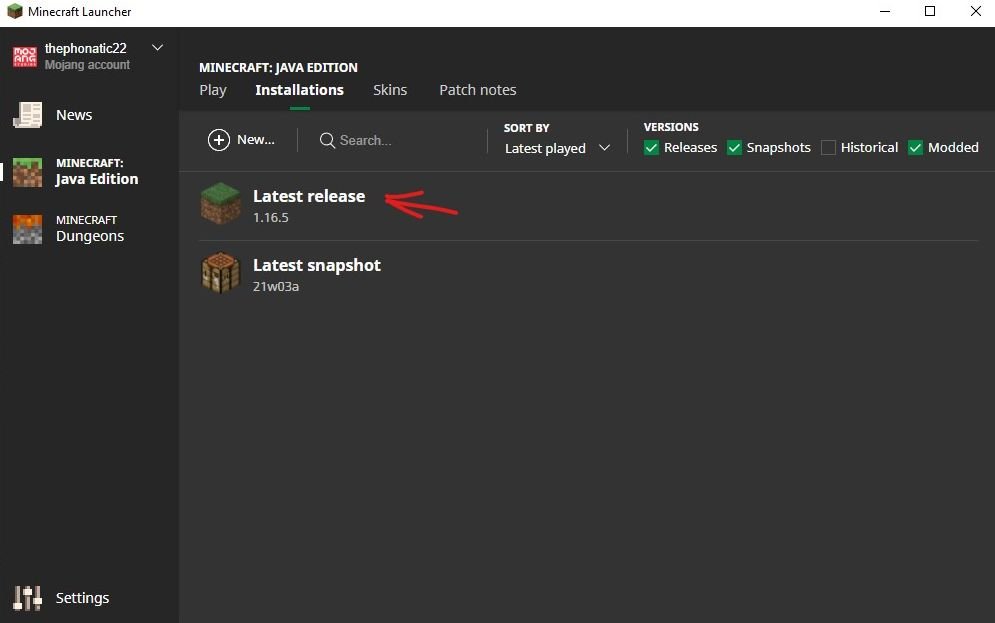
This will likely be called Latest Release
4. Edit the Installation
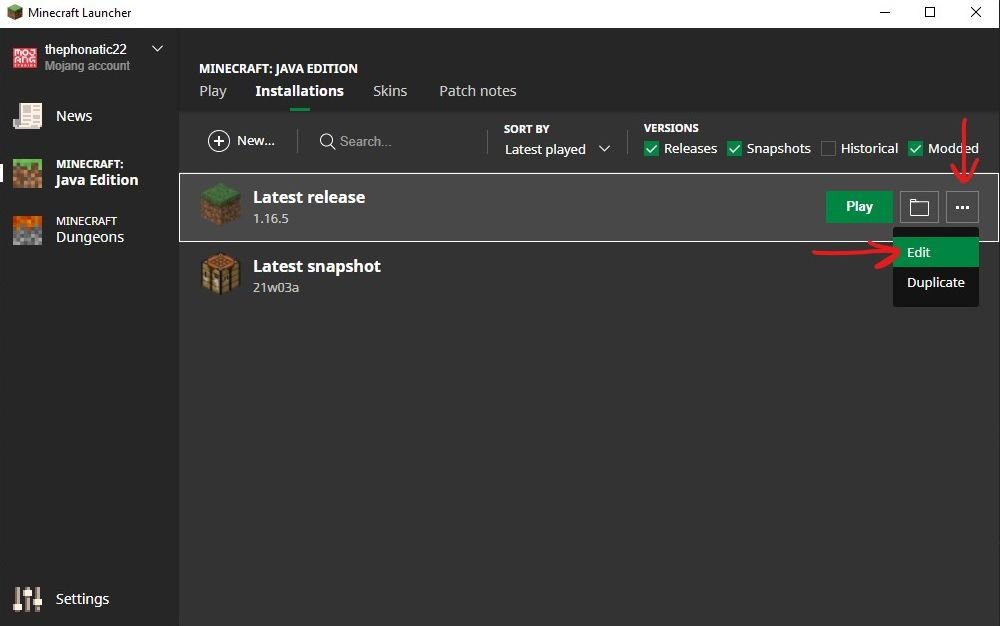
Open menu and click Edit
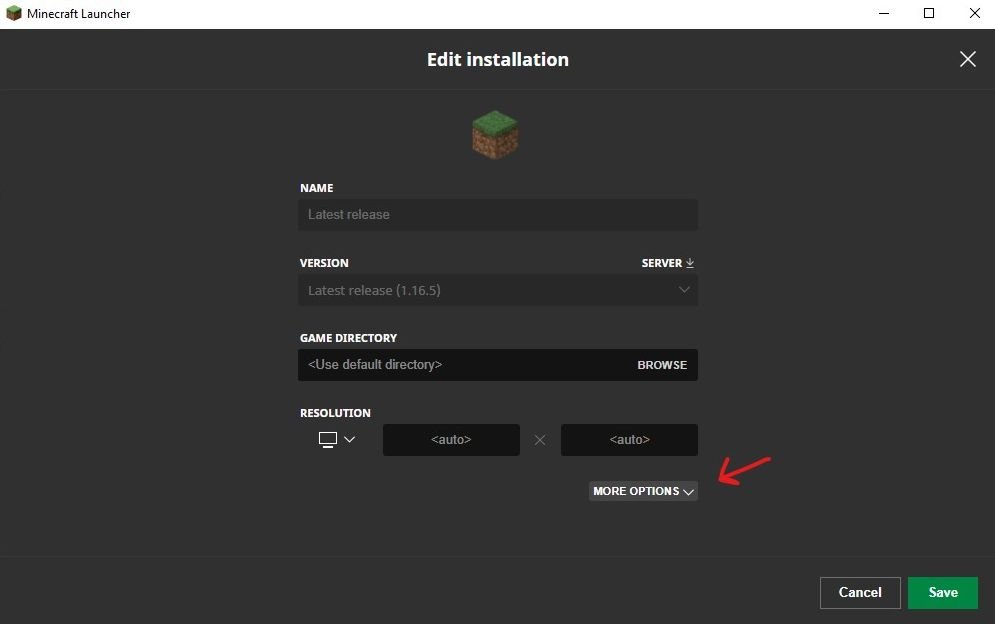
Expand the options and find JVM Arguments
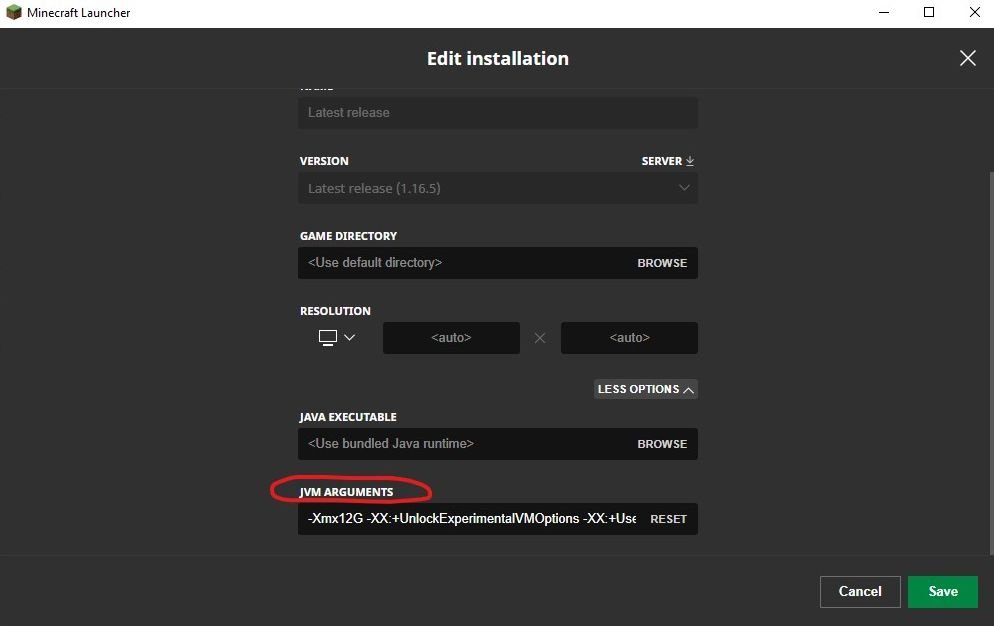
I have mine set to 12GB already, but it will likely say 2GB
Replace the 2G after -Xmx with whatever amount of RAM you decided to allocate. For example if I were to allocate 12GB of RAM like I have already done I would simply type 12G and that would be all.
5. Checking that it worked
To verify that the RAM has been allocated launch the game and join a world or server and press F3 to open the debug menu.

Multiply the GB value you entered earlier by 1024 and it should be the same as the number after the /. If it is, your allocation change has worked!
Congratulations, you have successfully allocated more RAM to Minecraft, hopefully netting you more frames in the process. Now go mine those crafts.